RaspiPass 3DS
More actions
| RaspiPass | |
|---|---|
 | |
| General | |
| Author | Pinchie |
| Type | PC Utilities |
| Version | 0.7.4 |
| License | Mixed |
| Last Updated | 2017/04/30 |
| Links | |
| Download | |
| Website | |
| Source | |
| This application has been obsoleted by one or more applications that serve the same purpose, but are more stable or maintained. |
RaspiPass is a means of accessing StreetPass Relay points from your home, allowing you to send and receive StreetPass hits all over the world. It uses a method commonly known as *Homepass* to emulate an existing StreetPass Relay access point, and exchange hits with Nintendo's servers.
Previous versions of RaspiPass existed for the Raspberry Pi 1 and 2 but relied on an external USB wireless network adapter, and these were only distributed to friends as complete units with compatible wifi dongles. With the release of the Raspberry Pi 3 and it's on-board wifi adapter, RaspiPass as it's known today was created. It was the first of its kind written specifically for the Raspberry Pi 3, intended to be a single unit without any need of peripherals.
Note: As of the beginning of April 2018, Nintendo has discontinued the Streetpass Relay system and RaspiPass is no longer usable.
Features
- Simple setup using only a Raspberry Pi 3 and its on-board hardware.
- Activates automatically based on user-configurable random timings.
- Configuration via web front-end.
- Firewall configuration to only allow traffic necessary for StreetPass Relay.
Installation
Before installing
- Download the archive and run Win32 Disk Imager (Windows) or ApplePi-Baker (Mac).
- If running Windows, extract the .img file from the zipped image file.
- Insert a Micro-SD card 2Gb or larger.
Write Image - Windows
- Open Win32 Disk Imager, click the "Open" icon and select the .img file extracted earlier.
- Select your Micro-SD's drive letter from the drop-down.
- Click the "Write" button to write the image to the selected drive.
- Once complete, close Win32 Disk Imager and safely eject your Micro-SD.
Write Image - Mac
- Open ApplePi-Baker - you will need to enter your admin password.
- Select your Micro-SD in the left of the window.
- Click "Prep for NOOBS" to format the card.
- Click the "..." button in the Restore section of the window, and select the RaspiPass .zip file downloaded earlier.
- Click the "Restore" button to write the image to the selected drive.
- Once complete, close ApplePi-Baker and safely eject your Micro-SD.
Update from developer 30/04/2017:
Installations should be able to be made functional again by running the following over SSH (if you have previous verison installed, it is advised to reimage rather than upgrade, due to some filesystem changes altering/overriding log locations).
sudo iptables -A INPUT -s 52.43.174.40 -j ACCEPT
sudo iptables -A INPUT -s 192.195.204.216 -j ACCEPT
sudo iptables -A INPUT -s 52.10.249.207 -j ACCEPT
sudo iptables -A OUTPUT -d 52.43.174.40 -j ACCEPT
sudo iptables -A OUTPUT -d 192.195.204.216 -j ACCEPT
sudo iptables -A OUTPUT -d 52.10.249.207 -j ACCEPT
sudo iptables -A FORWARD -d 52.43.174.40 -j ACCEPT
sudo iptables -A FORWARD -d 192.195.204.216 -j ACCEPT
sudo iptables -A FORWARD -d 52.10.249.207 -j ACCEPT
sudo iptables -A FORWARD -s 52.43.174.40 -j ACCEPT
sudo iptables -A FORWARD -s 192.195.204.216 -j ACCEPT
sudo iptables -A FORWARD -s 52.10.249.207 -j ACCEPT
sudo iptables-save > /raspi_secure/firewall.rules
There is also beta release in the git working local tree of the image. You can give that a look-see by SSH'ing in and running.
cd /git
git checkout working
sudo ./scripts/copy_to_sysdirs.sh -a
User guide
Start RaspiPass
Insert the Micro-SD card into your powered-down Raspberry Pi 3 (with ethernet connected) and turn on.
Allow the device to boot up (the first boot may take a little while as it may need to perform some initial storage fiddling).
Open http://raspipass/ to access the Web GUI and adjust settings as desired.
From here the device should run automatically. You can force the script to start, or shut down the device by using the buttons under the "Admin Tasks" tab in the Web GUI.
Useful links
- StreetPass Relay Info via Nintendo NA.
- Image & Imaging Software via Dropbox.
- Wiki (Guide/FAQs) via GitHub.
- HomePass Spreadsheet (backup).
FAQ
Q. What are the login details?
User: raspi
Password: pinchie
Q.Does this work on a Raspberry Pi 2?
Not out-of-the-box. The software is set up to use the Raspberry Pi 3's on-board wireless chip, while the Pi 2 has no on-board wifi. If you can find a USB wifi adapter that will let you create an AP and change the MAC address, you may be able to use the image to get you most of the way, and you'll just have to set up your wifi adapter to work on wlan0. Results will vary from adapter to adapter, but others have succeeded using this software, a Pi2, and the right wireless adapter.
Q. How secure is the wireless network this creates?
Hopefully, bloody secure.
The iptables configuration is set to allow only traffic necessary for your 3DS to jump onto the network, get an address, and talk specifically to the Nintendo StreetPass Relay servers. I do invite you to jump onto the network with another device and do some penetration testing - I'm always anxious to try and close any loopholes I may have left open. So far in my testing I haven't found any major security issues.
Q. Why can't I get your image onto a 2Gb card?
While I've been through a couple of "2Gb" cards trying to find the smallest. After a few attempts and suggestions I'm currently using a Kingston 2Gb with a total size of 1,954,545,664 bytes.
What I've learned is that cards of the same labelled size are not actually the same, and can vary from brand to brand. I aim to keep the image as small as possible, but if you find a "2Gb" card that's smaller than the image requires, you may have to use a 4Gb. Alternatively, I'm very willing to trade our 2Gb cards - my larger one for your smaller one - in order to make a more compatible image.
Q. Can I install manually, or do I have to use the disk image?
Well there's nothing stopping you installing manually.
There is a deprecated guide here, but be sure to download the most recent firewall configuration from the GitHub repo, or you won't get any StreetPass hits.
Q. I have a router/laptop/other device I can create an access point with...can't I just use that?
Absolutely. As long as you can change the MAC address and set the SSID to the correct name you can do this yourself.
See the Homepass Site for the info you'll need.
Q. Can I use RaspiPass with RetroPie/XBMC/other Raspberry Pi software?
Yes and no.
While RaspiPass is at its heart just a glorified BASH script, the way it uses the network interfaces may cause some issues with other software. It 'bridges' the wired and wireless interfaces into a single interface - br0. When the wireless interface is brought down to turn off a hotspot there can be a few seconds of transmission delay while the OS sorts itself out. By all means try it, but I can't guarantee flawless performance of other software.
The strict firewall setting can also be a hindrance, but if you're willing to sacrifice the security of the open network for co-functionality with other Pi software then that's up to you - I just try to make it as secure as possible at the time of distribution. Any decisions you make from there are up to you. :)
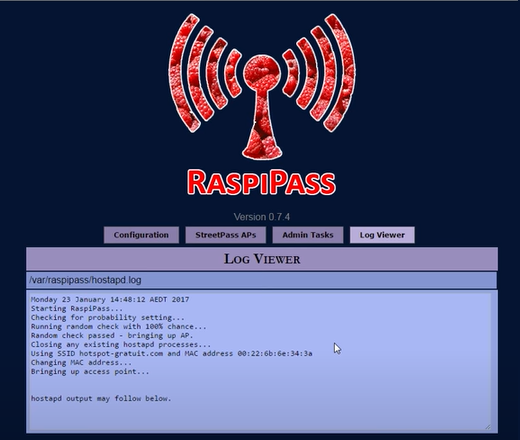
Screenshots
Media
How to Get Free StreetPass With Raspipass | Raspberry Pi | From Start To Finish (by HighTeckMan).
Changelog
beta
- A better back-end for the Web GUI.
- Locale changing from the Web GUI.
0.7.4 2016/12/12
Log & live config location changes:
- Moved almost every dynamic RaspiPass file (eg logs, dynamic config) to /var/raspipass.
- Configured two tmpfs drives mounted on /var/raspipass and /var/log/apache2 in order to reduce SD use.
- Added configuration in copy_to_sysdirs.sh to create these mount points in fstab if they do not exist (reboot required after).
Script changes:
- Standardised scripts with parameters - all scripts now have an -h parameter.
- Improved update script.
- Altered copy_to_sysdirs.sh to reference a csv file /git/scripts/filepermissions to use as a source when copying & setting permissions.
- Added more logs to /raspi_secure/clear_logs.sh.
- Cleaned up output of clear_logs.sh and set_defaults.sh.
- Removed copy_to_gitdir.sh - this was only required when Git wasn't used properly.
Other changes:
- Removed lots of commented out lines of code that were used during initial debugging.
- Set up daily downloading of latest version file from GitHub raw servers (for update checking).
- Added notification of required reboot to Web GUI (triggered by presence of /var/raspipass/reboot - message is contents of first line.
- Added daily download task (at 00:00:00) of latest master 'version' file from GitHub server to check for latest version file.
- Permitted access to GitHub raw server to allow above download.