PNGLive Vita: Difference between revisions
More actions
No edit summary |
.... |
||
| Line 11: | Line 11: | ||
|website=https://vitadb.rinnegatamante.it/#/info/1113 | |website=https://vitadb.rinnegatamante.it/#/info/1113 | ||
|source= | |source= | ||
|donation=https:// | |donation=https://ko-fi.com/wolfgirlbreeder | ||
}} | }} | ||
{{#seo: | {{#seo: | ||
| Line 19: | Line 19: | ||
|image_alt=PNGLive | |image_alt=PNGLive | ||
}} | }} | ||
PNGLive is a homebrew that allows you to stream with a PNGtuber using the PS Vita/PSTV. After setup on your system and integration into OBS, you're good to go. | |||
== Installation == | |||
=== Step 1 === | |||
== | |||
=== | |||
Make sure the following files exist: | Make sure the following files exist: | ||
<pre> | <pre> | ||
| Line 57: | Line 53: | ||
app0:/image/UI/keys2.png | app0:/image/UI/keys2.png | ||
</pre> | </pre> | ||
====Notes==== | |||
Open "active.txt" in the packs you plan to use and change "0" to "1" if not already done to activate the prop pack. | |||
If a situation occurs where a pack is set to active but the number before is not then the pack before will crash app. Please rename the pack folders if you want to move them or have an unused pack before. | |||
If you do not have enough props to fill each required image in the packs you are using you can simply add a 1x1 pixel image of any colour and opacity. | |||
If this leads to odd renders, duplicate a prop from the same pack to fill the spot. | |||
====Adding props==== | |||
When adding your props make sure they are scaled to 960x544 and are rotated -90 degrees so they stick to the right side of the screen. It is recommended to use a program such as gimp, ibis paint, or medibang paint to scale all your props in the same image then lining them up using layers and individually exporting the layers. | |||
If your prop does not touch the edge of the 960x544 canvas you can optionally crop those down until the prop is in the bottom right corner. Cropping smaller or floating props and using a 1x1 pixel for unused props will speed up load times and stability (less disk and memory use). | |||
Each category is limited to 5 packs of props. Each pack is limited to 2-4 props due to the psvita control scheme. | |||
====Pack previews==== | |||
If you are on a PS Vita or PS TV you can add previews to your packs by editing app0:/image/model/[set]/pkX/pack.png, a blank template can be found in app0:/template/pack.png | |||
If you are in Vita3k you can add previews to your packs by editing app:/image/UI/keys2.png and app0:/image/UI/settings2.png, blank templates can be found at app0:/template/keys2.png and app0:/template/settings2.png | |||
*Accessories: 4 per pack, action buttons | |||
*Cosmetics: 3 per pack, touchscreen | |||
*Expressions: 4 per pack, dpad | |||
*Hands: 2 per pack, selection buttons | |||
*Settings: 2 per pack, bumpers | |||
A template for the pack previews can be found at app0:/template/pack.png | |||
=== Step 2 (for Vita) === | |||
Install and set up [[UDCD_UVC_Vita|UDCD_UVC]] plugin. | |||
Plug your system into your PC, open your preferred streaming or recording software. | |||
Add a video capture device (webcam), select your system as the webcam. | |||
Rotate the video capture device window 90 degrees and crop 110 pixels off the left/top. | |||
Apply a chromakey. If a green chromakey causes issues with your character then change the chromakey colour to your desired rgb value then open ux0:/data/WolfgirlBreeder/png/greenscreen.cfg and enter that rgb value, please ensure each value is 3 digits and that they are partitioned by. | |||
Start streaming or recording. | |||
=== Step 2 (for PSTV) === | |||
Get any hdmi capture card (cheap amazon usb capture sticks work fine). | |||
Open your preferred streaming or recording software, add a video capture device (webcam). | |||
Select your capture card as the webcam. | |||
Rotate the video capture device window 90 degrees and crop the left/top until the ui is nolonger visible. | |||
Apply a chromakey. If a green chromakey causes issues with your character then change the chromakey colour to your desired rgb value then open ux0:/data/WolfgirlBreeder/png/greenscreen.cfg and enter that rgb value, please ensure each value is 3 digits and that they are partitioned by. | |||
Start streaming or recording. | |||
=== Step 2 (for Vita3K desktop) === | |||
Suffer and pray all your props and the ui render (some images vanishing after 30 frames is a known issue with an unknown cause). | |||
Open your preferred streaming or recording software. | |||
Add a window capture, rotate the window capture 90 degrees and crop the left/top until the ui is nolonger visible. | |||
If a green chromakey causes issues with your character then change the chromakey colour to your desired rgb value then open ux0:/data/WolfgirlBreeder/png/greenscreen.cfg and enter that rgb value, please ensure each value is 3 digits and that they are partitioned by. | |||
Start streaming or recording | |||
=== | === Step 2 (for Vita3K mobile) === | ||
Suffer and pray all your props and the ui render (some images vanishing after 30 frames is a known issue with an unknown cause). | |||
Turn off onscreen controls. | |||
Optional: Connect a bluetooth controller (PNGLive contains onscreen buttons). | |||
Stream your screen to your desktop, open your prefered streaming or recording software. | |||
Add a your screen stream, rotate the stream 90 degrees and crop the left/top until the ui is nolonger visible. | |||
If a green chromakey causes issues with your character then change the chromakey colour to your desired rgb value then open ux0:/data/WolfgirlBreeder/png/greenscreen.cfg and enter that rgb value, please ensure each value is 3 digits and that they are partitioned by. | |||
Start streaming or recording. | |||
=== Optional Step 3 === | |||
You can enable or disable the main ui by opening ux0:/data/WolfgirlBreeder/png/onscreen.cfg and changing the first number to 0. | |||
You can also disable the pack previews by changing th third number to 0, and the onscreen buttons by changing the second number to 0. | |||
=== | === Notes === | ||
* | *Please note that updating or downgrading the app will delete you config if config templates change. | ||
* | *Please compare ux0:/data/WolfgirlBreeder/png/version.cfg and PNGLive.vpk/template/version.cfg and ensure they are the same. | ||
*If they do not match or this is your first install any current settings will be reset and the defaults will be created. | |||
*Before installing a different version or reinstalling the current version copy app0:/image/Model somewhere else then copy it back after installing. | |||
*If you do not do this then your PNGtuber or Vtuber 2D assets will be reset and replaced with Salts PNGtuber wearing a tuxedo. | |||
*All model files go inside the app package itself so if you uninstall it will remove those. | |||
*All config files go inside the data folder so they will not be removed if uninstalled, you have to delete those manually. | |||
== Controls == | == Controls == | ||
Triangle - Toggle accessory 0 | |||
Square - Toggle accessory 1 | |||
Cross - Toggle accessory 2 | |||
Circle - Toggle accessory 3 | |||
Up/Left/Down/Right - Expression 0/1/2/3 | |||
Select/Start - Switch hand 0/1 | |||
L/R - Toggle setting 0/1 | |||
T1/T2/T3 - Cosmetic 0/1/2 | |||
Tcos - Change cosmetic pack | |||
Tacc - Change accessory pack | |||
Than - Change hand pack | |||
Tset - Change setting pack | |||
Texp - Change expression pack | |||
After changing a prop pack props will not change until you change a prop governed by that pack. | |||
If you go past the pack number you want to use then keep going, the pack number will reset to 1 after reaching the highest pack you have enabled. | |||
==Screenshots== | ==Screenshots== | ||
| Line 176: | Line 184: | ||
https://dlhb.gamebrew.org/vitahomebrews/pnglivevita-02.png | https://dlhb.gamebrew.org/vitahomebrews/pnglivevita-02.png | ||
== | == Known issues == | ||
* Buttons render with weird clipping | * Buttons render with weird clipping, this is an issue with the pixel numbers. | ||
* Buttons do not rotate in Vita3k | * Buttons do not rotate in Vita3k, this is because there is only a check for if this is running on hardware or in software. | ||
* Vita3k crashes if packs are switched 99% of the time | * Vita3k crashes if packs are switched 99% of the time. | ||
* Settings and cosmetics graphics are swapped | * Settings and cosmetics graphics are swapped. | ||
* This is an example at this moment and setting this up is very time consuming and somewhat confusing. | |||
* Updating deletes my PNGtuber | * Updating deletes my PNGtuber, this is because the model is currently stored in the app package itself. | ||
* Updating resets my config files | * Updating resets my config files. | ||
* The app crashes if a pack is empty but set to active | * The app crashes if a pack is empty but set to active, make sure you read the instructions. | ||
==Changelog== | ==Changelog== | ||
'''v0.4-beta''' | '''v0.4-beta''' | ||
* First Release. | * First Release. | ||
== External links == | == External links == | ||
* VitaDB - https://vitadb.rinnegatamante.it/#/info/1113 | * VitaDB - https://vitadb.rinnegatamante.it/#/info/1113 | ||
Revision as of 06:52, 8 September 2023
| PNGLive | |
|---|---|
 | |
| General | |
| Author | WolfgirlBreeder |
| Type | Other Apps |
| Version | 0.4-beta |
| License | Mixed |
| Last Updated | 2023/08/14 |
| Links | |
| Download | |
| Website | |
| Support Author | |
PNGLive is a homebrew that allows you to stream with a PNGtuber using the PS Vita/PSTV. After setup on your system and integration into OBS, you're good to go.
Installation
Step 1
Make sure the following files exist:
app0:/image/model/accessories/pk1/active.txt
app0:/image/model/accessories/pk1/0.png
app0:/image/model/accessories/pk1/1.png
app0:/image/model/accessories/pk1/2.png
app0:/image/model/accessories/pk1/3.png
app0:/image/model/accessories/pk1/pack.png
app0:/image/model/cosmetics/pk1/active.txt
app0:/image/model/cosmetics/pk1/0.png
app0:/image/model/cosmetics/pk1/1.png
app0:/image/model/cosmetics/pk1/2.png
app0:/image/model/cosmetics/pk1/pack.png
app0:/image/model/expressions/pk1/active.txt
app0:/image/model/expressions/pk1/0.png
app0:/image/model/expressions/pk1/1.png
app0:/image/model/expressions/pk1/2.png
app0:/image/model/expressions/pk1/3.png
app0:/image/model/expressions/pk1/pack.png
app0:/image/model/hands/pk1/active.txt
app0:/image/model/hands/pk1/0.png
app0:/image/model/hands/pk1/1.png
app0:/image/model/hands/pk1/pack.png
app0:/image/model/settings/pk1/active.txt
app0:/image/model/settings/pk1/0.png
app0:/image/model/settings/pk1/1.png
app0:/image/model/settings/pk1/pack.png
app0:/image/UI/settings2.png
app0:/image/UI/keys2.png
Notes
Open "active.txt" in the packs you plan to use and change "0" to "1" if not already done to activate the prop pack.
If a situation occurs where a pack is set to active but the number before is not then the pack before will crash app. Please rename the pack folders if you want to move them or have an unused pack before.
If you do not have enough props to fill each required image in the packs you are using you can simply add a 1x1 pixel image of any colour and opacity.
If this leads to odd renders, duplicate a prop from the same pack to fill the spot.
Adding props
When adding your props make sure they are scaled to 960x544 and are rotated -90 degrees so they stick to the right side of the screen. It is recommended to use a program such as gimp, ibis paint, or medibang paint to scale all your props in the same image then lining them up using layers and individually exporting the layers.
If your prop does not touch the edge of the 960x544 canvas you can optionally crop those down until the prop is in the bottom right corner. Cropping smaller or floating props and using a 1x1 pixel for unused props will speed up load times and stability (less disk and memory use).
Each category is limited to 5 packs of props. Each pack is limited to 2-4 props due to the psvita control scheme.
Pack previews
If you are on a PS Vita or PS TV you can add previews to your packs by editing app0:/image/model/[set]/pkX/pack.png, a blank template can be found in app0:/template/pack.png
If you are in Vita3k you can add previews to your packs by editing app:/image/UI/keys2.png and app0:/image/UI/settings2.png, blank templates can be found at app0:/template/keys2.png and app0:/template/settings2.png
- Accessories: 4 per pack, action buttons
- Cosmetics: 3 per pack, touchscreen
- Expressions: 4 per pack, dpad
- Hands: 2 per pack, selection buttons
- Settings: 2 per pack, bumpers
A template for the pack previews can be found at app0:/template/pack.png
Step 2 (for Vita)
Install and set up UDCD_UVC plugin.
Plug your system into your PC, open your preferred streaming or recording software.
Add a video capture device (webcam), select your system as the webcam.
Rotate the video capture device window 90 degrees and crop 110 pixels off the left/top.
Apply a chromakey. If a green chromakey causes issues with your character then change the chromakey colour to your desired rgb value then open ux0:/data/WolfgirlBreeder/png/greenscreen.cfg and enter that rgb value, please ensure each value is 3 digits and that they are partitioned by.
Start streaming or recording.
Step 2 (for PSTV)
Get any hdmi capture card (cheap amazon usb capture sticks work fine).
Open your preferred streaming or recording software, add a video capture device (webcam).
Select your capture card as the webcam.
Rotate the video capture device window 90 degrees and crop the left/top until the ui is nolonger visible.
Apply a chromakey. If a green chromakey causes issues with your character then change the chromakey colour to your desired rgb value then open ux0:/data/WolfgirlBreeder/png/greenscreen.cfg and enter that rgb value, please ensure each value is 3 digits and that they are partitioned by.
Start streaming or recording.
Step 2 (for Vita3K desktop)
Suffer and pray all your props and the ui render (some images vanishing after 30 frames is a known issue with an unknown cause).
Open your preferred streaming or recording software.
Add a window capture, rotate the window capture 90 degrees and crop the left/top until the ui is nolonger visible.
If a green chromakey causes issues with your character then change the chromakey colour to your desired rgb value then open ux0:/data/WolfgirlBreeder/png/greenscreen.cfg and enter that rgb value, please ensure each value is 3 digits and that they are partitioned by.
Start streaming or recording
Step 2 (for Vita3K mobile)
Suffer and pray all your props and the ui render (some images vanishing after 30 frames is a known issue with an unknown cause).
Turn off onscreen controls.
Optional: Connect a bluetooth controller (PNGLive contains onscreen buttons).
Stream your screen to your desktop, open your prefered streaming or recording software.
Add a your screen stream, rotate the stream 90 degrees and crop the left/top until the ui is nolonger visible.
If a green chromakey causes issues with your character then change the chromakey colour to your desired rgb value then open ux0:/data/WolfgirlBreeder/png/greenscreen.cfg and enter that rgb value, please ensure each value is 3 digits and that they are partitioned by.
Start streaming or recording.
Optional Step 3
You can enable or disable the main ui by opening ux0:/data/WolfgirlBreeder/png/onscreen.cfg and changing the first number to 0.
You can also disable the pack previews by changing th third number to 0, and the onscreen buttons by changing the second number to 0.
Notes
- Please note that updating or downgrading the app will delete you config if config templates change.
- Please compare ux0:/data/WolfgirlBreeder/png/version.cfg and PNGLive.vpk/template/version.cfg and ensure they are the same.
- If they do not match or this is your first install any current settings will be reset and the defaults will be created.
- Before installing a different version or reinstalling the current version copy app0:/image/Model somewhere else then copy it back after installing.
- If you do not do this then your PNGtuber or Vtuber 2D assets will be reset and replaced with Salts PNGtuber wearing a tuxedo.
- All model files go inside the app package itself so if you uninstall it will remove those.
- All config files go inside the data folder so they will not be removed if uninstalled, you have to delete those manually.
Controls
Triangle - Toggle accessory 0
Square - Toggle accessory 1
Cross - Toggle accessory 2
Circle - Toggle accessory 3
Up/Left/Down/Right - Expression 0/1/2/3
Select/Start - Switch hand 0/1
L/R - Toggle setting 0/1
T1/T2/T3 - Cosmetic 0/1/2
Tcos - Change cosmetic pack
Tacc - Change accessory pack
Than - Change hand pack
Tset - Change setting pack
Texp - Change expression pack
After changing a prop pack props will not change until you change a prop governed by that pack.
If you go past the pack number you want to use then keep going, the pack number will reset to 1 after reaching the highest pack you have enabled.
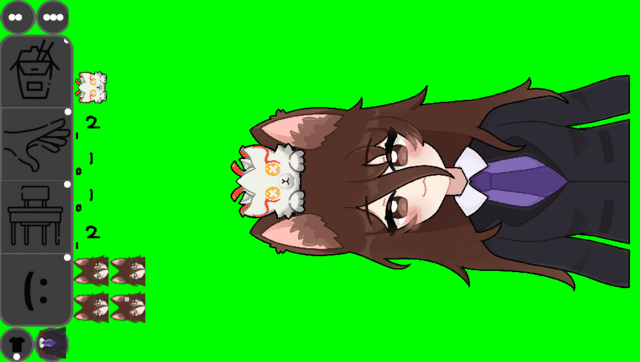
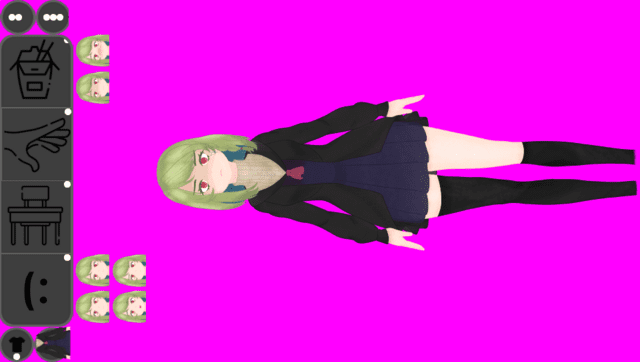
Screenshots
Known issues
- Buttons render with weird clipping, this is an issue with the pixel numbers.
- Buttons do not rotate in Vita3k, this is because there is only a check for if this is running on hardware or in software.
- Vita3k crashes if packs are switched 99% of the time.
- Settings and cosmetics graphics are swapped.
- This is an example at this moment and setting this up is very time consuming and somewhat confusing.
- Updating deletes my PNGtuber, this is because the model is currently stored in the app package itself.
- Updating resets my config files.
- The app crashes if a pack is empty but set to active, make sure you read the instructions.
Changelog
v0.4-beta
- First Release.