No edit summary |
|||
| (28 intermediate revisions by the same user not shown) | |||
| Line 1: | Line 1: | ||
{{Infobox 3DS | {{Infobox 3DS Homebrews | ||
| title = GodMode9 | |title=GodMode9 | ||
| image = | |image=Godmode92.png | ||
| type = | |description=A full access file browser for the Nintendo 3DS console. | ||
| version = | |author=d0k3 | ||
| | |lastupdated=2022/03/23 | ||
| | |type=File Browsers | ||
|version=2.1.1 | |||
| | |license=Mixed | ||
| source = https:// | |download=https://dlhb.gamebrew.org/3dshomebrews/godmode9.7z | ||
|website=https://github.com/d0k3/GodMode9 | |||
|source=https://github.com/d0k3/GodMode9 | |||
}} | }} | ||
< | GodMode9 is a full access file browser for the Nintendo 3DS console, giving you access to your SD card, to the FAT partitions inside your SysNAND and EmuNAND and to basically anything else. Among other functionality (see below), you can copy, delete, rename files and create folders. | ||
'''Note from developers:''' | |||
This is powerful stuff, it provides you with the means to do basically any thinkable modification to any system data available on the 3DS console. However, precautions are taken so you don't accidentally damage the data of your console. The write permissions system protects you by providing warnings and forces you to enter an unlock sequence for enabling write permissions. It is not possible to overwrite or modify any important stuff without such unlock sequences and it is not possible to accidentally unlock something. | |||
As always, be smart, keep backups, just to be safe. | |||
==Features== | |||
* Manage files on all your data storages, such as copy, delete, rename files and create folders. | |||
* Make screenshots. | |||
* Use multiple panes. | |||
* Search drives and folders. | |||
* Format your SD card/setup a RedNAND. | |||
* Run it without an SD card/unmount the SD card. | |||
* Direct access to SD installed contents. | |||
* Build CIAs from NCCH/NCSD (.3DS)/TMD (installed contents). | |||
* Decrypt and verify NCCH/NCSD/CIA/TMD/FIRM images. | |||
* Batch mode for the above two operations. | |||
* Access any file inside NCCH/NCSD/CIA/FIRM images. | |||
* Generate XORpads for any NAND partition. | |||
* Directly mount and access NAND dumps or standard FAT images. | |||
* Restore/dump NAND partitions or even full NANDs. | |||
* Compare and verify files. | |||
* Hexview and hexedit any file. | |||
* Inject a file to another file. | |||
==Installation== | |||
The recommended bootloader for use with GodMode9 is [[fastboot3DS]]. There are [https://github.com/d0k3/GodMode9/issues/466 known issues for some users] when using the standard setup based on [[boot9strap 3DS|boot9strap]] and [[Luma3DS]]. If you are using that setup, follow the instructions found in [https://3ds.hacks.guide this guide]. Here's how to set up GodMode9 (and fastboot3DS) up quickly. | |||
* Download [[OpenFirmInstaller_3DS|OpenFirmInstaller]] and follow the quick setup instructions found there. | |||
* Copy the <code>gm9</code> folder from the release archive to your SD card. | |||
* Then, get good versions of <code>seeddb.bin</code> and <code>encTitleKeys.bin</code> from somewhere and put these two files into <code>sd:/gm9/support</code> (optional but recommended for full functionality). | |||
** It is also recommended you setup the RTC clock if you're running GodMode9 for the first time. | |||
** Find the option via HOME button > <code>More...</code>. Also keep in mind that you should fix your system OS clock afterwards. | |||
** While you're in the <code>More...</code> menu, you may also set screen brightness to a fixed value of your choosing and manually calibrate the touch screen (*not recommended* - try the automatic configuration first). | |||
'''About support files:''' | |||
For certain functionality, GodMode9 may need support files. Support files should be placed into either <code>0:/gm9/support</code> or <code>1:/gm9/support</code>. Support files contain additional information that is required in decryption operations. A list of support files, and what they do, is found below. Please don't ask for support files - find them yourself. | |||
* <code>aeskeydb.bin</code> - Should contain 0x25keyX, 0x18keyX and 0x1BkeyX to enable decryption of 7x/Secure3/Secure4 encrypted NCCH files, 0x11key95/0x11key96 for FIRM decrypt support and 0x11keyOTP/0x11keyIVOTP for secret sector 0x96 crypto support. Entrypoints other than boot9strap or fastboot3ds may require a aeskeydb.bin file. This is now included in standard releases of GM9. | |||
* <code>seeddb.bin</code> - This file is optional and required to decrypt and mount seed-encrypted NCCHs and CIAs (if the seed in question is not installed to your NAND). Note that your seeddb.bin must also contain the seed for the specific game you need to decrypt. | |||
* <code>encTitleKeys.bin/decTitleKeys.bin</code> - These files are optional and provide titlekeys, which are required to decrypt and install contents downloaded from CDN (for DSi and 3DS content). | |||
'''Helpful notes:''' | |||
* Go [https://3ds.hacks.guide/godmode9-usage here] for step by steps on doing some common tasks in GodMode9. Especially users coming from Decrypt9WIP or Hourglass9 may find this to be helpful. | |||
* Never unlock the [https://github.com/d0k3/GodMode9#write-permissions-system red write permission level] unless you know exactly what you're doing. You will notice that prompt when it comes up, it features a completely red screen. It is recommended you stay on the yellow permission level or below at all times to be completely safe. Also read more on the write permissions system below. | |||
'''How to update GodMode9:''' | |||
* Just replace GodMode9.firm on your SD card with the file found in the release ZIP. | |||
* You may also want to update scripts, which are found in the ./gm9 folder inside the archive and go to the same folder on your SD card. | |||
= | ==User guide== | ||
With the possibilites GodMode9 provides, not everything may be obvious at first glance. In short, GodMode9 includes improved versions of basically everything that Decrypt9 has, and more. Any kind of dumps and injections are handled via standard copy operations and more specific operations are found inside the A button menu. The A button menu also works for batch operations when multiple files are selected. A (incomplete) list of what GodMode9 can do follows below. | |||
See also [https://github.com/d0k3/GodMode9#drives-in-godmode9 Drives in GodMode9]. | |||
===Basic functionality=== | |||
* '''Manage files on all your data storages:''' | |||
** Included are all standard file operations such as copy, delete, rename files and create folders. | |||
** Use the L button to mark multiple files and apply file operations to multiple files at once. | |||
*''' Make screenshots: ''' | |||
** Press R+L anywhere. Screenshots are stored in PNG format. | |||
*''' Use multiple panes: ''' | |||
** Press R+left|right. This enables you to stay in one location in the first pane and open another in the second pane. | |||
* '''Search drives and folders: ''' | |||
** Just press R+A on the drive/folder you want to search. | |||
* '''Compare and verify files: ''' | |||
** Press the A button on the first file, select Calculate SHA-256. Do the same for the second file. | |||
** If the two files are identical, you will get a message about them being identical. | |||
** On the SDCARD drive (0:) you can also write an SHA file, so you can check for any modifications at a later point. | |||
* '''Hexview and hexedit any file: ''' | |||
** Press the A button on a file and select Show in Hexeditor. | |||
** A button again enables edit mode, hold the A button and press arrow buttons to edit bytes. | |||
** You will get an additional confirmation prompt to take over changes. Take note that for certain files, write permissions can't be enabled. | |||
* '''View text files in a text viewer: ''' | |||
** Press the A button on a file and select Show in Textviewer (only shows up for actual text files). | |||
** You can enable wordwrapped mode via R+Y, and navigate around the file via R+X and the dpad. | |||
* '''Chainload FIRM payloads: ''' | |||
** Press the A button on a FIRM file, select FIRM options > Boot FIRM. | |||
** Keep in mind you should not run FIRMs from dubious sources and that the write permissions system is no longer in place after booting a payload. | |||
* '''Chainload FIRM payloads from a neat menu: ''' | |||
** The payloads menu is found inside the HOME button menu. | |||
** It provides any FIRM found in 0:/gm9/payloads for quick chainloading. | |||
* '''Inject a file to another file: ''' | |||
** Put exactly one file (the file to be injected from) into the clipboard (via the Y button). | |||
** Press A on the file to be injected to. There will be an option to inject the first file into it. | |||
== | ===Scripting functionality=== | ||
* '''Run .gm9 scripts from anywhere on your SD card: ''' | |||
** You can run scripts in .gm9 format via the A button menu. .gm9 scripts use a shell-like language and can be edited in any text editor. | |||
** For an overview of usable commands have a look into the sample scripts included in the release archive. | |||
** Don't run scripts from untrusted sources. | |||
* '''Run .gm9 scripts via a neat menu: ''' | |||
** Press the HOME button, select More... > Scripts.... Any script you put into 0:/gm9/scripts (subdirs included) will be found here. | |||
** Scripts ran via this method won't have the confirmation at the beginning either. | |||
'''This | ===SD card handling=== | ||
* '''Format your SD card/setup an EmuNAND: ''' | |||
** Press the HOME button, select More... > SD format menu. | |||
** This also allows to setup a RedNAND (single/multi) or GW type EmuNAND on your SD card. | |||
** You will get a warning prompt and an unlock sequence before any operation starts. | |||
* '''Handle multiple EmuNANDs: ''' | |||
** Press the HOME button, select More... > Switch EmuNAND to switch between EmuNANDs/RedNANDs. | |||
** Only available on multi EmuNAND/RedNAND systems. | |||
* '''Run it without an SD card/unmount the SD card: ''' | |||
** If no SD card is found, you will be offered to run without the SD card. | |||
** You can also unmount and remount your SD card from the file system root at any point. | |||
* '''Direct access to SD installed contents: ''' | |||
** Just take a look inside the A:/B: drives. | |||
** On-the-fly-crypto is taken care for, you can access this the same as any other content. | |||
* '''Set (and use) the RTC clock: ''' | |||
** For correct modification/creation dates in your file system, you need to setup the RTC clock first. | |||
** Press the HOME Button and select More... to find the option. | |||
** Keep in mind that modifying the RTC clock means you should also fix system OS time afterwards. | |||
''' | ===Game file handling=== | ||
* '''List titles installed on your system: ''' | |||
** Press HOME and select Title manager. | |||
** This will also work via R+A for CTRNAND and A:/B: drives. | |||
** This will list all titles installed in the selected location. | |||
* '''Install titles to your system: ''' | |||
** Just press A on any file you want installed and select Install game image from the submenu. | |||
** Works with NCCH/NCSD/CIA/DSiWare SRLs/ 3DS CDN TMDs/DSi CDN TMDs/NUS TMDs. | |||
* '''(Batch) Uninstall titles from your system: ''' | |||
** Most easily done via the HOME menu Title manager. | |||
** Just select one or more titles and find the option inside the Manage title... submenu. | |||
* '''Build CIAs from NCCH/NCSD (.3DS)/SRL/TMD: ''' | |||
** Press A on the file you want converted and the option will be shown. | |||
** Installed contents are found most easily via the HOME menu Title manager. | |||
** Where applicable, you will also be able to generate legit CIAs. Note: this works also from a file search and title listing. | |||
* '''Dump CXIs/NDS from TMD (installed contents): ''' | |||
** This works the same as building CIAs, but dumps decrypted CXIs or NDS rom dumps instead. | |||
** Note: this works also from a file search and title listing. | |||
* '''Decrypt, encrypt and verify NCCH/NCSD/CIA/BOSS/FIRM images: ''' | |||
** Options are found inside the A button menu. | |||
** You will be able to decrypt/encrypt to the standard output directory or (where applicable) in place. | |||
* '''Decrypt content downloaded from CDN/NUS: ''' | |||
** Press A on the file you want decrypted. | |||
** For this to work, you need at least a TMD file (encTitlekeys.bin/decTitlekeys.bin also required, see Support files below) or a CETK file. | |||
** Either keep the names provided by CDN/NUS, or rename the downloaded content to (anything).nus or (anything).cdn and the CETK to (anything).cetk. | |||
* '''Batch mode for the above operations: ''' | |||
** Just select multiple files of the same type via the L button, then press the A button on one of the selected files. | |||
* '''Access any file inside NCCH/NCSD/CIA/FIRM/NDS images: ''' | |||
** Just mount the file via the A button menu and browse to the file you want. | |||
** For CDN/NUS content, prior decryption is required for full access. | |||
* '''Rename your NCCH/NCSD/CIA/NDS/GBA files to proper names: ''' | |||
** Find this feature inside the A button menu. Proper names include title id, game name, product code and region. | |||
* '''Trim NCCH/NCSD/NDS/GBA/FIRM/NAND images: ''' | |||
** This feature is found inside the A button menu. | |||
** It allows you to trim excess data from supported file types. | |||
** Warning: Excess data may not be empty, bonus drives are stored there for NAND images, NCSD card2 images store savedata there, for FIRMs parts of the A9LH exploit may be stored there. | |||
* '''Dump 3DS/NDS/DSi type retail game cartridges:''' | |||
** Insert the cartridge and take a look inside the C: drive. | |||
** You may also dump private headers from 3DS game cartridges. | |||
** The C: drive also gives you read/write access to the saves on the cartridges. | |||
** Note: For 4GiB cartridges, the last byte is not included in the .3ds file dump. This is due to restrictrions of the FAT32 file system. | |||
== | ===NAND handling=== | ||
* '''Directly mount and access NAND dumps or standard FAT images:''' | |||
** Press the A button on these files to get the option. You can only mount NAND dumps from the same console. | |||
* '''Restore NAND dumps while keeping your A9LH/sighax installation intact: ''' | |||
** Select Restore SysNAND (safe) from inside the A button menu for NAND dumps. | |||
* '''Restore/dump NAND partitions or even full NANDs: ''' | |||
** Just take a look into the S: (or E:/ I:) drive. This is done the same as any other file operation. | |||
* '''Transfer CTRNAND images between systems: ''' | |||
** Transfer the file located at S:/ctrnand_full.bin (or E:/ I:). | |||
** On the receiving system, press A, select CTRNAND Options..., then Transfer to NAND. | |||
* '''Embed an essential backup right into a NAND dump: ''' | |||
** This is available in the A button menu for NAND dumps. | |||
** Essential backups contain NAND header, movable.sed, LocalFriendCodeSeed_B, SecureInfo_A, NAND CID and OTP. | |||
** If your local SysNAND does not contain an embedded backup, you will be asked to do one at startup. | |||
** To update the essential SysNAND backup at a later point in time, press A on S:/nand.bin and select NAND image options... -> Update embedded backup. | |||
* '''Install an AES key database to your NAND: ''' | |||
** For aeskeydb.bin files the option is found in aeskeydb.bin options > Install aeskeydb.bin. | |||
** Only the recommended key database can be installed (see above). With an installed key database, it is possible to run the GodMode9 bootloader completely from NAND. | |||
* '''Install FIRM files to your NAND: ''' | |||
** Found inside the A button menu for FIRM files, select FIRM options > Install FIRM. | |||
** Use this with caution - installing an incompatible FIRM file will lead to a brick. | |||
** The FIRMs signature will automagically be replaced with a sighax signature to ensure compatibility. | |||
* '''Actually use that extra NAND space: ''' | |||
** You can set up a bonus drive via the HOME menu, which will be available via drive letter 8:. | |||
** Only available on systems that have the extra space. | |||
* '''Fix certain problems on your NANDs: ''' | |||
** You can fix CMACs for a whole drive (works on A:, B:, S: and E:) via an entry in the R+A button menu, or even restore borked NAND headers back to a functional state (inside the A button menu of borked NANDs and available for S:/nand_hdr.bin). | |||
** Recommended only for advanced users. | |||
The | ===System file handling=== | ||
* '''Check and fix CMACs (for any file that has them): ''' | |||
** The option will turn up in the A button menu if it is available for a given file (f.e. system savegames, ticket.db, etc...). | |||
** This can also be done for multiple files at once if they are marked. | |||
* '''Mount ticket.db files and dump tickets: ''' | |||
** Mount the file via the A button menu. | |||
** Tickets are sorted into eshop (stuff from eshop), system (system tickets), unknown (typically empty) and hidden (hidden tickets, found via a deeper scan) categories. | |||
** All tickets displayed are legit, fake tickets are ignored. | |||
* '''Inject any NCCH CXI file into Health & Safety: ''' | |||
** The option is found inside the A button menu for any NCCH CXI file. NCCH CXIs are found, i.e. inside of CIAs. | |||
** Keep in mind there is a (system internal) size restriction on H&S injectable apps. | |||
* '''Inject and dump GBA VC saves: ''' | |||
** Find the options to do this inside the A button menu for agbsave.bin in the S: drive. | |||
** Keep in mind that you need to start the specific GBA game on your console before dumping/injecting the save. | |||
** To inject a save it needs to be in the clipboard. | |||
* '''Dump a copy of boot9, boot11 & your OTP: ''' | |||
** This works on sighax, via boot9strap only. These files are found inside the M: drive and can be copied from there to any other place. | |||
===Support file handling=== | |||
* | * '''Build decTitleKeys.bin/encTitleKeys.bin/seeddb.bin: ''' | ||
* | ** Press the HOME button, select More... > Build support files. | ||
** decTitleKeys.bin/encTitleKeys.bin can also be created/merged from tickets, ticket.db and merged from other decTitleKeys.bin/encTitleKeys.bin files via the A button menu. | |||
* | * '''Build, mount, decrypt and encrypt aeskeydb.bin: ''' | ||
** AES key databases can be merged from other aeskeydb.bin or build from legacy slot??Key?.bin files. | |||
** Just select one or more files, press A on one of them and then select Build aeskeydb.bin. | |||
** Options for mounting, decrypting and encrypting are also found in the A button menu. | |||
===Dumping games with GodMode9=== | |||
Dumping games is the act of taking a game from your system or gamecart and copying it into a readable format onto your SD card. Dumping is perfectly legal if you keep the dumps to yourself, however sharing these dumps is piracy and is illegal. | |||
This guide will tell you how to dump games from various formats and for various purposes (by [https://gist.github.com/PixelSergey/73d0a4bc1437dbaa53a1d1ce849fdda1 PixelSergey]). Dumping 3DS cartriges as .cia files is good if you want to install them to your system. Dumping them as .3ds files is good for emulators. Installed titles cannot be dumped as .3ds files. NDS cartiges can only be dumped as .nds files and cannot be installed (however, you can play them with emulators or flashcarts). | |||
Dumping the RomFS of a game is primarily for romhacking purposess. RomFS is the place where a game stores its data. If dumped and modified, these files can be used with Luma's [https://gist.github.com/PixelSergey/5dbb4a9b90d290736353fa58e4fcbb42 LayeredFS feature] to patch games. | |||
Many instructions here are adapted from Plailect's [https://3ds.hacks.guide/godmode9-usage Godmode9 Usage page]. This guide requires [[Luma3DS]], [[boot9strap 3DS|b9s]] and Godmode9. If you do not have any of those, please follow [https://3ds.hacks.guide/ the guide]. | |||
'''Dumping a 3DS game cartrige as a .3ds file:''' | |||
* Insert your gamecart into your console. | |||
* Boot your console while holding (START) to launch Godmode9. | |||
* Navigate to [C:] GAMECART. | |||
* Press (A) on the <titleid>.trim.3ds file in the drive. | |||
* Select Copy to /gm9/out. | |||
* Press (START) to save and reboot. | |||
* Your dump will be in the /gm9/out folder on the SD card. | |||
'''Dumping a 3DS game cartrige as a .cia file:''' | |||
* Insert your gamecart into your console. | |||
* Boot your console while holding (START) to launch Godmode9. | |||
* Navigate to [C:] GAMECART. | |||
* Press (A) on the <titleid>.trim.3ds file in the drive. | |||
* Select NCSD image options..., then select Build CIA from file. | |||
* Press (START) to save and reboot. | |||
* Your dump will be in the /gm9/out folder on the SD card. | |||
'''Dumping an NDS game cartrige as a .nds file:''' | |||
* Insert your gamecart into your console. | |||
* Boot your console while holding (START) to launch Godmode9. | |||
* Navigate to [C:] GAMECART. | |||
* Press (A) on the <titleid>.trim.nds file in the drive. | |||
* Select Copy to /gm9/out. | |||
* Press (START) to save and reboot. | |||
* Your dump will be in the /gm9/out folder on the SD card. | |||
'''Dumping an installed title as a .cia file:''' | |||
* Boot your console while holding (START) to launch Godmode9. | |||
* Hold (R)+(A) while pointing to [A:] SYSNAND SD to open the drive options. | |||
* Selct Search for titles. | |||
* Press (A) to continue. | |||
* Press (A) on the .tmd file of the game you want to dump. | |||
* Select TMD file options... then select Build CIA (standard). | |||
* Your dump will be in the /gm9/out folder on your sd card. | |||
'''Dumping a system title as a .cia file:''' | |||
* Boot your console while holding (START) to launch Godmode9. | |||
* Hold (R)+(A) while pointing to [1:] SYSNAND CTRNAND to open the drive options. | |||
* Selct Search for titles. | |||
* Press (A) to continue. | |||
* Press (A) on the .tmd file of the game you want to dump. | |||
* Select TMD file options... then select Build CIA (standard). | |||
* Your dump will be in the /gm9/out folder on your sd card. | |||
'''Extracting RomFS from a 3DS game cartrige:''' | |||
* Insert your gamecart into your console. | |||
* Boot your console while holding (START) to launch Godmode9. | |||
* Navigate to [C:] GAMECART. | |||
* Press (A) on the <titleid>.trim.3ds file in the drive. | |||
* Select NCSD image options..., then select Mount image to drive. | |||
* Press (A) to enter the drive. | |||
* For each file you want to dump, press (A) while hovering over it and select Copy to /gm9/out. | |||
* For each folder you want to dump, press (R)+(A) while hovering over it and select Copy to /gm9/out. | |||
* Press (START) to save and reboot. | |||
* Your files will be in the /gm9/out folder on the SD card. | |||
'''Extracting RomFS from an NDS game cartrige:''' | |||
* Insert your gamecart into your console. | |||
* Boot your console while holding (START) to launch Godmode9. | |||
* Navigate to [C:] GAMECART. | |||
* Press (A) on the <titleid>.trim.nds file in the drive. | |||
* Select NDS image options..., then select Mount image to drive. | |||
* Press (A) to enter the drive. | |||
* For each file you want to dump, press (A) while hovering over it and select Copy to /gm9/out. | |||
* For each folder you want to dump, press (R)+(A) while hovering over it and select Copy to /gm9/out. | |||
* Press (START) to save and reboot. | |||
* Your files will be in the /gm9/out folder on the SD card. | |||
'''Extracting RomFS from an installed title:''' | |||
* Boot your console while holding (START) to launch Godmode9. | |||
* Hold (R)+(A) while pointing to [A:] SYSNAND SD to open the drive options. | |||
* Selct Search for titles. | |||
* Press (A) to continue. | |||
* Press (A) on the .tmd file of the game which you want to extract the RomFS from. | |||
* Select TMD file options... then select Mount CXI/NDS to drive. | |||
* Press (A) to enter the drive. | |||
* For each file you want to dump, press (A) while hovering over it and select Copy to /gm9/out. | |||
* For each folder you want to dump, press (R)+(A) while hovering over it and select Copy to /gm9/out. | |||
* Press (START) to save and reboot. | |||
* Your files will be in the /gm9/out folder on the SD card. | |||
'''Extracting RomFS from a system title:''' | |||
* Boot your console while holding (START) to launch Godmode9. | |||
* Hold (R)+(A) while pointing to [1:] SYSNAND CTRNAND to open the drive options. | |||
* Selct Search for titles. | |||
* Press (A) to continue. | |||
* Press (A) on the .tmd file of the game which you want to extract the RomFS from. | |||
* Select TMD file options... then select Mount CXI/NDS to drive. | |||
* Press (A) to enter the drive. | |||
* For each file you want to dump, press (A) while hovering over it and select Copy to /gm9/out. | |||
* For each folder you want to dump, press (R)+(A) while hovering over it and select Copy to /gm9/out. | |||
* Press (START) to save and reboot. | |||
* Your files will be in the /gm9/out folder on the SD card. | |||
'''Extracting RomFS from a .cia/.3ds/.nds file:''' | |||
* | * Obtain your game file using one of the methods above. | ||
* | * Boot your console while holding (START) to launch Godmode9. | ||
* | * Navigate to your game file inside the [0:] SDCARD drive. | ||
* | * Press (A) on the game file. | ||
* Select <type> image options..., then select Mount image to drive. | |||
* Press (A) to enter the drive. | |||
* Press (A) on any files or (R)+(A) on any folders you want to dump, then select Copy to /gm9/out. | |||
* Your files will be in the /gm9/out folder on the SD card. | |||
'''Converting .3ds files to .cia files:''' | |||
* Boot your console while holding (START) to launch Godmode9. | |||
* Navigate to your .3ds file inside of the [0:] SDCARD drive. | |||
* Press (A) on the .3ds file. | |||
* Select NCSD image options... them select Build CIA from file. | |||
* Your converted .cia file will be in the /gm9/out folder on the SD card. | |||
==Controls== | |||
A - Confirm prompts, select button (menus), Open submenu for files and open directories (main file view), Switch into edit mode (hexviewer) | |||
R+A - Open submenu (on directories) | |||
B - Cancel, Leave menus without action, Hold to cancel said file operations | |||
X - Delete marked files, R+X to Rename files (main file view) | |||
Y - Copy and paste files, R+Y to create folders and dummy files (main file view) | |||
L - Mark file | |||
L+Right/Left - Mark/unmark all files in a folder | |||
L(hold)+Up/Down - Select multiple files | |||
R - Switch buttons to their secondary function | |||
R+L - Screenshot (works almost anywhere) | |||
R+Left/Right - Switch panes | |||
R+Down - Reload the file listing | |||
Start - Reboot from GodMode9, R+Start to poweroff 3DS | |||
Select - Clear or restores the clipboard (depending on if it's empty or not) | |||
Home - Enter HOME menu, including the scripts/payloads submenus, options for formatting the SD, setting the RTC, etc | |||
Power button - Enter HOME menu (alternative) | |||
R+Up (at startup) - Pauses the GodMode9 boot so that you can stare at the splash screen for a little longer | |||
R+Left - If you have installed GodMode9 as your bootloader, this keycombo enters the bootmenu when you hold on startup (if you built GodMode9 as SALTMODE and have it as a bootloader, the keycombo is simply the Start button) | |||
==Screenshots== | |||
https://dlhb.gamebrew.org/3dshomebrews/godmode93.png | |||
https://dlhb.gamebrew.org/3dshomebrews/godmode94.png | |||
https://dlhb.gamebrew.org/3dshomebrews/godmode95.png | |||
https://dlhb.gamebrew.org/3dshomebrews/godmode96.png | |||
==Media== | |||
'''How to Use Godmode9 - to "Dump 3DS Carts to CIA files" & Keep Saves! (Digitally Backup Cartridges)''' ([https://www.youtube.com/watch?v=Tz0i11Y2cvc GameInCanada]) <br> | |||
<youtube>Tz0i11Y2cvc</youtube> | |||
== | ==Changelog== | ||
'''v2.1.1''' | |||
* [improved] Improved installation of DSiWare games (thanks @Epicpkmn11). | |||
* [scripting] Faster script loading as well as other improvements and fixes (thanks @aspargas2). | |||
* [fixed] Fixed a nasty bug when trimming certain DS cart dumps. | |||
* [fixed] Some smaller bugfixes and general code maintenance. | |||
'''v2.1.0''' | |||
* [new] Unicode support, including a special Unicode font created for GodMode9 (@Epicpkmn11). | |||
* [new] Support for mounting certs.db, including improvement of certs handling (@luigoalma). | |||
* [new] Support for SHA-1 checksums (@aspargas2). | |||
* [new] Raw cart dumper, accessible via R+A on cart drive. | |||
* [improved] Wider support for flash chips on carts, including ir (@dratini0). | |||
* [scripting] SDSIZE, SDFREE and NANDFREE global variables. | |||
* [scripting] Added cartdump command. | |||
* [fixed] Numerous bugfixes and small improvements, too many to list. | |||
'''v2.0.0''' | |||
* [new] Completely revamped title info, with special info for installed titles, TMDs and CIAs. | |||
* [new] Initial CARD2 save read support for carts (thanks @dratini0). | |||
* [improved] Title manager now includes a ticket dumper. | |||
* [improved] Release ntrboot FIRMs now include scripts (thanks @gholms). | |||
* [improved] Software keyboard now includes firstrun instructions. | |||
* [improved/fixed] Various smaller visual improvements and bugfixes. | |||
'''v1.9.3pre1''' | |||
* [new] Completely rewritten MCU event handler (fixes a lot of stuff) (thanks @Wolfvak). | |||
* [new] Ability to install, build CIA from, verify, identify DSi CDN content (read below). | |||
* [new] Title manager available via HOME menu (read below). | |||
* [new] NDS carts can be dumped with secure area encrypted (thanks @mariomadproductions for testing). | |||
* [new] Gamecart drive G:/ now includes an info text file (thanks @GerbilSoft). | |||
* [new] Tickets can now be verified, installed and identified. | |||
* [new] Trimming functionality for GBA rom dumps. | |||
* [improved] Improved title info functionality, now compatible with more files. | |||
* [improved] Several improvements to the GM9 MegaScript (thanks @aspargas2). | |||
* [improved] Several improvements to the game image installer. | |||
* [improved] Improved CIA builder, with stricter checks for legit builds. | |||
* [improved] Better handling of special cases in cart dumper (thanks @GerbilSoft). | |||
* [fixed] Proper seed handling when installing game images to the system. | |||
* [fixed] Countless smaller fixes and improvements, too many to list. | |||
* [scripting] 'install' command for installing game images to system. | |||
* [scripting] Quotes can be escaped (\") in variables. | |||
'''v1.9.2pre1''' | |||
* | * [new] Mount support for title.db (thanks @aspargas2). | ||
* | * [new] Support for handling variable sized tickets (thanks @luigoalma). | ||
* | * [improved] Proper mount support for ticket.db (thanks @aspargas2). | ||
* | * [improved] Various improvements to the CIA builder, mostly for CIA from NCSD. | ||
* [improved] Tons of small performance improvements (thanks @Wolfvak). | |||
* [improved] Much smaller firm size (thanks @Wolfvak). | |||
* | * [fixed] Fixed screen init (for real this time) (thanks @Wolfvak). | ||
* [fixed] Tons of small bug fixes. | |||
* [preview] Possibility to install NCCH, NCSD (.3DS), DSiWare NDS, CIA, NUS/CDN to the system. | |||
* | |||
* | |||
* | |||
* | |||
'''v1.9.1''' | |||
* [new] On verification, offer fixing for badly decrypted NCCH/NCSD. | |||
* [improved] Much faster scrolling speeds in wordwrapped text view. | |||
* [improved] Largely improved method of GBA VC save injection (thanks @TurdPooCharger). | |||
* [fixed] Fixed the .BPS code in scripting (thanks @Wolfvak). | |||
* [fixed] Fixed a crash in the DISA/DIFF handling code (thanks @aspargas2). | |||
* [fixed] Actually allow decrypting N3DS NATIVE_FIRM on O3DS. | |||
* [fixed] Last search drive is back again. | |||
* [fixed] Cart drive checking (don't show empty when it isn't). | |||
* [fixed] Notification light handling. | |||
'''v1.9.0''' | |||
* [new] Touchscreen support, used for keyboard (manual calibration is possible, but not required). | |||
* [new] LED support, signaling finished operations when the shell is closed. | |||
* [new] Detecting shell opened/closed, turn off display to save battery. | |||
* [new] Brightness configuration (in HOME menu). | |||
* [new] Support for mounting, reading and writing DISA and DIFF (.db) files (thanks @aspargas2). | |||
* [new] Allow setting attributes for directories. | |||
* [new] Read and write support for gamecart saves (thanks @dratini0). | |||
* [improved] Completely rewritten ARM11 core. | |||
* [improved] Countless under-the-hood improvements thanks to @Wolfvak. | |||
* [fixed] A metric fuckton of bugfixes (quoting @Wolfvak here). | |||
* [scripting] Allow game icons as preview. | |||
[https://github.com/d0k3/GodMode9/releases/tag/v2.1.0 Revision changelog.] | |||
==Credits== | |||
This tool would not have been possible without the help of numerous people. Thanks go to (in no particular order): | |||
* Archshift, for providing the base project infrastructure. | |||
* Normmatt, for sdmmc.c / sdmmc.h and gamecart code, and for being of great help on countless other occasions. | |||
* Cha(N), Kane49, and all other FatFS contributors for FatFS. | |||
* Wolfvak for ARM11 code, FIRM binary launcher, exception handlers, PCX code, Makefile and for help on countless other occasions. | |||
* SciresM for the help on figuring out RomFS and for boot9strap. | |||
* SciresM, Myria, Normmatt, TuxSH and hedgeberg for figuring out sighax and giving us access to bootrom. | |||
* ihaveamac for first developing the simple CIA generation method and for being of great help in porting it. | |||
* wwylele and aspargas2 for documenting and implementing the DISA, DIFF, and BDRI formats. | |||
* dratini0 for savefile management, based on TWLSaveTool. | |||
* b1l1s for the help on figuring out A9LH compatibility. | |||
* Gelex and AuroraWright for the help on figuring out various things. | |||
* stuckpixel for the new 6x10 font and help on various things. | |||
* Al3x_10m for help with countless hours of testing and useful advice. | |||
* WinterMute for helping with his vast knowledge on everything gamecart related. | |||
* profi200 for always useful advice and helpful hints on various things. | |||
* windows-server-2003 for the initial implementation of if-else-goto in .gm9 scripts. | |||
* Kazuma77 for pushing forward scripting, for testing and for always useful advice. | |||
* TurdPooCharger for being one of the most meticulous software testers around. | |||
* JaySea, YodaDaCoda, liomajor, Supster131, imanoob, Kasher_CS and countless others from freenode #Cakey and the GBAtemp forums for testing, feedback and helpful hints. | |||
* Shadowhand for being awesome and hosting my nightlies. | |||
* Plailect for putting his trust in my tools and recommending this in The Guide. | |||
* SirNapkin1334 for testing, bug reports and for hosting the original GodMode9 Discord server. | |||
* Lilith Valentine for testing and helpful advice. | |||
* Project Nayuki for qrcodegen. | |||
* Amazingmax fonts for the Amazdoom font. | |||
* The fine folks on the official GodMode9 IRC channel and Discord server. | |||
* The fine folks on freenode #Cakey. | |||
* All 3dbrew.org editors. | |||
== | ==External links== | ||
* GitHub - https://github.com/d0k3/GodMode9 | |||
* Discord - https://discord.gg/BRcbvtFxX4 | |||
* GBAtemp - https://gbatemp.net/threads/release-godmode9-all-access-file-browser-for-the-3ds.420027 | |||
* Reddit - https://www.reddit.com/r/3dshacks/comments/mauor0/godmode9_v200_fifth_anniversary_release | |||
* 3DS Guide - https://quantumcat1.github.io/godmode9-usage.html | |||
[[Category:3DS homebrew applications]] | |||
[[Category:Homebrew utility applications on 3DS]] | |||
Latest revision as of 01:01, 5 February 2023
| GodMode9 | |
|---|---|
 | |
| General | |
| Author | d0k3 |
| Type | File Browsers |
| Version | 2.1.1 |
| License | Mixed |
| Last Updated | 2022/03/23 |
| Links | |
| Download | |
| Website | |
| Source | |
GodMode9 is a full access file browser for the Nintendo 3DS console, giving you access to your SD card, to the FAT partitions inside your SysNAND and EmuNAND and to basically anything else. Among other functionality (see below), you can copy, delete, rename files and create folders.
Note from developers:
This is powerful stuff, it provides you with the means to do basically any thinkable modification to any system data available on the 3DS console. However, precautions are taken so you don't accidentally damage the data of your console. The write permissions system protects you by providing warnings and forces you to enter an unlock sequence for enabling write permissions. It is not possible to overwrite or modify any important stuff without such unlock sequences and it is not possible to accidentally unlock something.
As always, be smart, keep backups, just to be safe.
Features
- Manage files on all your data storages, such as copy, delete, rename files and create folders.
- Make screenshots.
- Use multiple panes.
- Search drives and folders.
- Format your SD card/setup a RedNAND.
- Run it without an SD card/unmount the SD card.
- Direct access to SD installed contents.
- Build CIAs from NCCH/NCSD (.3DS)/TMD (installed contents).
- Decrypt and verify NCCH/NCSD/CIA/TMD/FIRM images.
- Batch mode for the above two operations.
- Access any file inside NCCH/NCSD/CIA/FIRM images.
- Generate XORpads for any NAND partition.
- Directly mount and access NAND dumps or standard FAT images.
- Restore/dump NAND partitions or even full NANDs.
- Compare and verify files.
- Hexview and hexedit any file.
- Inject a file to another file.
Installation
The recommended bootloader for use with GodMode9 is fastboot3DS. There are known issues for some users when using the standard setup based on boot9strap and Luma3DS. If you are using that setup, follow the instructions found in this guide. Here's how to set up GodMode9 (and fastboot3DS) up quickly.
- Download OpenFirmInstaller and follow the quick setup instructions found there.
- Copy the
gm9folder from the release archive to your SD card. - Then, get good versions of
seeddb.binandencTitleKeys.binfrom somewhere and put these two files intosd:/gm9/support(optional but recommended for full functionality).- It is also recommended you setup the RTC clock if you're running GodMode9 for the first time.
- Find the option via HOME button >
More.... Also keep in mind that you should fix your system OS clock afterwards. - While you're in the
More...menu, you may also set screen brightness to a fixed value of your choosing and manually calibrate the touch screen (*not recommended* - try the automatic configuration first).
About support files:
For certain functionality, GodMode9 may need support files. Support files should be placed into either 0:/gm9/support or 1:/gm9/support. Support files contain additional information that is required in decryption operations. A list of support files, and what they do, is found below. Please don't ask for support files - find them yourself.
aeskeydb.bin- Should contain 0x25keyX, 0x18keyX and 0x1BkeyX to enable decryption of 7x/Secure3/Secure4 encrypted NCCH files, 0x11key95/0x11key96 for FIRM decrypt support and 0x11keyOTP/0x11keyIVOTP for secret sector 0x96 crypto support. Entrypoints other than boot9strap or fastboot3ds may require a aeskeydb.bin file. This is now included in standard releases of GM9.seeddb.bin- This file is optional and required to decrypt and mount seed-encrypted NCCHs and CIAs (if the seed in question is not installed to your NAND). Note that your seeddb.bin must also contain the seed for the specific game you need to decrypt.encTitleKeys.bin/decTitleKeys.bin- These files are optional and provide titlekeys, which are required to decrypt and install contents downloaded from CDN (for DSi and 3DS content).
Helpful notes:
- Go here for step by steps on doing some common tasks in GodMode9. Especially users coming from Decrypt9WIP or Hourglass9 may find this to be helpful.
- Never unlock the red write permission level unless you know exactly what you're doing. You will notice that prompt when it comes up, it features a completely red screen. It is recommended you stay on the yellow permission level or below at all times to be completely safe. Also read more on the write permissions system below.
How to update GodMode9:
- Just replace GodMode9.firm on your SD card with the file found in the release ZIP.
- You may also want to update scripts, which are found in the ./gm9 folder inside the archive and go to the same folder on your SD card.
User guide
With the possibilites GodMode9 provides, not everything may be obvious at first glance. In short, GodMode9 includes improved versions of basically everything that Decrypt9 has, and more. Any kind of dumps and injections are handled via standard copy operations and more specific operations are found inside the A button menu. The A button menu also works for batch operations when multiple files are selected. A (incomplete) list of what GodMode9 can do follows below.
See also Drives in GodMode9.
Basic functionality
- Manage files on all your data storages:
- Included are all standard file operations such as copy, delete, rename files and create folders.
- Use the L button to mark multiple files and apply file operations to multiple files at once.
- Make screenshots:
- Press R+L anywhere. Screenshots are stored in PNG format.
- Use multiple panes:
- Press R+left|right. This enables you to stay in one location in the first pane and open another in the second pane.
- Search drives and folders:
- Just press R+A on the drive/folder you want to search.
- Compare and verify files:
- Press the A button on the first file, select Calculate SHA-256. Do the same for the second file.
- If the two files are identical, you will get a message about them being identical.
- On the SDCARD drive (0:) you can also write an SHA file, so you can check for any modifications at a later point.
- Hexview and hexedit any file:
- Press the A button on a file and select Show in Hexeditor.
- A button again enables edit mode, hold the A button and press arrow buttons to edit bytes.
- You will get an additional confirmation prompt to take over changes. Take note that for certain files, write permissions can't be enabled.
- View text files in a text viewer:
- Press the A button on a file and select Show in Textviewer (only shows up for actual text files).
- You can enable wordwrapped mode via R+Y, and navigate around the file via R+X and the dpad.
- Chainload FIRM payloads:
- Press the A button on a FIRM file, select FIRM options > Boot FIRM.
- Keep in mind you should not run FIRMs from dubious sources and that the write permissions system is no longer in place after booting a payload.
- Chainload FIRM payloads from a neat menu:
- The payloads menu is found inside the HOME button menu.
- It provides any FIRM found in 0:/gm9/payloads for quick chainloading.
- Inject a file to another file:
- Put exactly one file (the file to be injected from) into the clipboard (via the Y button).
- Press A on the file to be injected to. There will be an option to inject the first file into it.
Scripting functionality
- Run .gm9 scripts from anywhere on your SD card:
- You can run scripts in .gm9 format via the A button menu. .gm9 scripts use a shell-like language and can be edited in any text editor.
- For an overview of usable commands have a look into the sample scripts included in the release archive.
- Don't run scripts from untrusted sources.
- Run .gm9 scripts via a neat menu:
- Press the HOME button, select More... > Scripts.... Any script you put into 0:/gm9/scripts (subdirs included) will be found here.
- Scripts ran via this method won't have the confirmation at the beginning either.
SD card handling
- Format your SD card/setup an EmuNAND:
- Press the HOME button, select More... > SD format menu.
- This also allows to setup a RedNAND (single/multi) or GW type EmuNAND on your SD card.
- You will get a warning prompt and an unlock sequence before any operation starts.
- Handle multiple EmuNANDs:
- Press the HOME button, select More... > Switch EmuNAND to switch between EmuNANDs/RedNANDs.
- Only available on multi EmuNAND/RedNAND systems.
- Run it without an SD card/unmount the SD card:
- If no SD card is found, you will be offered to run without the SD card.
- You can also unmount and remount your SD card from the file system root at any point.
- Direct access to SD installed contents:
- Just take a look inside the A:/B: drives.
- On-the-fly-crypto is taken care for, you can access this the same as any other content.
- Set (and use) the RTC clock:
- For correct modification/creation dates in your file system, you need to setup the RTC clock first.
- Press the HOME Button and select More... to find the option.
- Keep in mind that modifying the RTC clock means you should also fix system OS time afterwards.
Game file handling
- List titles installed on your system:
- Press HOME and select Title manager.
- This will also work via R+A for CTRNAND and A:/B: drives.
- This will list all titles installed in the selected location.
- Install titles to your system:
- Just press A on any file you want installed and select Install game image from the submenu.
- Works with NCCH/NCSD/CIA/DSiWare SRLs/ 3DS CDN TMDs/DSi CDN TMDs/NUS TMDs.
- (Batch) Uninstall titles from your system:
- Most easily done via the HOME menu Title manager.
- Just select one or more titles and find the option inside the Manage title... submenu.
- Build CIAs from NCCH/NCSD (.3DS)/SRL/TMD:
- Press A on the file you want converted and the option will be shown.
- Installed contents are found most easily via the HOME menu Title manager.
- Where applicable, you will also be able to generate legit CIAs. Note: this works also from a file search and title listing.
- Dump CXIs/NDS from TMD (installed contents):
- This works the same as building CIAs, but dumps decrypted CXIs or NDS rom dumps instead.
- Note: this works also from a file search and title listing.
- Decrypt, encrypt and verify NCCH/NCSD/CIA/BOSS/FIRM images:
- Options are found inside the A button menu.
- You will be able to decrypt/encrypt to the standard output directory or (where applicable) in place.
- Decrypt content downloaded from CDN/NUS:
- Press A on the file you want decrypted.
- For this to work, you need at least a TMD file (encTitlekeys.bin/decTitlekeys.bin also required, see Support files below) or a CETK file.
- Either keep the names provided by CDN/NUS, or rename the downloaded content to (anything).nus or (anything).cdn and the CETK to (anything).cetk.
- Batch mode for the above operations:
- Just select multiple files of the same type via the L button, then press the A button on one of the selected files.
- Access any file inside NCCH/NCSD/CIA/FIRM/NDS images:
- Just mount the file via the A button menu and browse to the file you want.
- For CDN/NUS content, prior decryption is required for full access.
- Rename your NCCH/NCSD/CIA/NDS/GBA files to proper names:
- Find this feature inside the A button menu. Proper names include title id, game name, product code and region.
- Trim NCCH/NCSD/NDS/GBA/FIRM/NAND images:
- This feature is found inside the A button menu.
- It allows you to trim excess data from supported file types.
- Warning: Excess data may not be empty, bonus drives are stored there for NAND images, NCSD card2 images store savedata there, for FIRMs parts of the A9LH exploit may be stored there.
- Dump 3DS/NDS/DSi type retail game cartridges:
- Insert the cartridge and take a look inside the C: drive.
- You may also dump private headers from 3DS game cartridges.
- The C: drive also gives you read/write access to the saves on the cartridges.
- Note: For 4GiB cartridges, the last byte is not included in the .3ds file dump. This is due to restrictrions of the FAT32 file system.
NAND handling
- Directly mount and access NAND dumps or standard FAT images:
- Press the A button on these files to get the option. You can only mount NAND dumps from the same console.
- Restore NAND dumps while keeping your A9LH/sighax installation intact:
- Select Restore SysNAND (safe) from inside the A button menu for NAND dumps.
- Restore/dump NAND partitions or even full NANDs:
- Just take a look into the S: (or E:/ I:) drive. This is done the same as any other file operation.
- Transfer CTRNAND images between systems:
- Transfer the file located at S:/ctrnand_full.bin (or E:/ I:).
- On the receiving system, press A, select CTRNAND Options..., then Transfer to NAND.
- Embed an essential backup right into a NAND dump:
- This is available in the A button menu for NAND dumps.
- Essential backups contain NAND header, movable.sed, LocalFriendCodeSeed_B, SecureInfo_A, NAND CID and OTP.
- If your local SysNAND does not contain an embedded backup, you will be asked to do one at startup.
- To update the essential SysNAND backup at a later point in time, press A on S:/nand.bin and select NAND image options... -> Update embedded backup.
- Install an AES key database to your NAND:
- For aeskeydb.bin files the option is found in aeskeydb.bin options > Install aeskeydb.bin.
- Only the recommended key database can be installed (see above). With an installed key database, it is possible to run the GodMode9 bootloader completely from NAND.
- Install FIRM files to your NAND:
- Found inside the A button menu for FIRM files, select FIRM options > Install FIRM.
- Use this with caution - installing an incompatible FIRM file will lead to a brick.
- The FIRMs signature will automagically be replaced with a sighax signature to ensure compatibility.
- Actually use that extra NAND space:
- You can set up a bonus drive via the HOME menu, which will be available via drive letter 8:.
- Only available on systems that have the extra space.
- Fix certain problems on your NANDs:
- You can fix CMACs for a whole drive (works on A:, B:, S: and E:) via an entry in the R+A button menu, or even restore borked NAND headers back to a functional state (inside the A button menu of borked NANDs and available for S:/nand_hdr.bin).
- Recommended only for advanced users.
System file handling
- Check and fix CMACs (for any file that has them):
- The option will turn up in the A button menu if it is available for a given file (f.e. system savegames, ticket.db, etc...).
- This can also be done for multiple files at once if they are marked.
- Mount ticket.db files and dump tickets:
- Mount the file via the A button menu.
- Tickets are sorted into eshop (stuff from eshop), system (system tickets), unknown (typically empty) and hidden (hidden tickets, found via a deeper scan) categories.
- All tickets displayed are legit, fake tickets are ignored.
- Inject any NCCH CXI file into Health & Safety:
- The option is found inside the A button menu for any NCCH CXI file. NCCH CXIs are found, i.e. inside of CIAs.
- Keep in mind there is a (system internal) size restriction on H&S injectable apps.
- Inject and dump GBA VC saves:
- Find the options to do this inside the A button menu for agbsave.bin in the S: drive.
- Keep in mind that you need to start the specific GBA game on your console before dumping/injecting the save.
- To inject a save it needs to be in the clipboard.
- Dump a copy of boot9, boot11 & your OTP:
- This works on sighax, via boot9strap only. These files are found inside the M: drive and can be copied from there to any other place.
Support file handling
- Build decTitleKeys.bin/encTitleKeys.bin/seeddb.bin:
- Press the HOME button, select More... > Build support files.
- decTitleKeys.bin/encTitleKeys.bin can also be created/merged from tickets, ticket.db and merged from other decTitleKeys.bin/encTitleKeys.bin files via the A button menu.
- Build, mount, decrypt and encrypt aeskeydb.bin:
- AES key databases can be merged from other aeskeydb.bin or build from legacy slot??Key?.bin files.
- Just select one or more files, press A on one of them and then select Build aeskeydb.bin.
- Options for mounting, decrypting and encrypting are also found in the A button menu.
Dumping games with GodMode9
Dumping games is the act of taking a game from your system or gamecart and copying it into a readable format onto your SD card. Dumping is perfectly legal if you keep the dumps to yourself, however sharing these dumps is piracy and is illegal.
This guide will tell you how to dump games from various formats and for various purposes (by PixelSergey). Dumping 3DS cartriges as .cia files is good if you want to install them to your system. Dumping them as .3ds files is good for emulators. Installed titles cannot be dumped as .3ds files. NDS cartiges can only be dumped as .nds files and cannot be installed (however, you can play them with emulators or flashcarts).
Dumping the RomFS of a game is primarily for romhacking purposess. RomFS is the place where a game stores its data. If dumped and modified, these files can be used with Luma's LayeredFS feature to patch games.
Many instructions here are adapted from Plailect's Godmode9 Usage page. This guide requires Luma3DS, b9s and Godmode9. If you do not have any of those, please follow the guide.
Dumping a 3DS game cartrige as a .3ds file:
- Insert your gamecart into your console.
- Boot your console while holding (START) to launch Godmode9.
- Navigate to [C:] GAMECART.
- Press (A) on the <titleid>.trim.3ds file in the drive.
- Select Copy to /gm9/out.
- Press (START) to save and reboot.
- Your dump will be in the /gm9/out folder on the SD card.
Dumping a 3DS game cartrige as a .cia file:
- Insert your gamecart into your console.
- Boot your console while holding (START) to launch Godmode9.
- Navigate to [C:] GAMECART.
- Press (A) on the <titleid>.trim.3ds file in the drive.
- Select NCSD image options..., then select Build CIA from file.
- Press (START) to save and reboot.
- Your dump will be in the /gm9/out folder on the SD card.
Dumping an NDS game cartrige as a .nds file:
- Insert your gamecart into your console.
- Boot your console while holding (START) to launch Godmode9.
- Navigate to [C:] GAMECART.
- Press (A) on the <titleid>.trim.nds file in the drive.
- Select Copy to /gm9/out.
- Press (START) to save and reboot.
- Your dump will be in the /gm9/out folder on the SD card.
Dumping an installed title as a .cia file:
- Boot your console while holding (START) to launch Godmode9.
- Hold (R)+(A) while pointing to [A:] SYSNAND SD to open the drive options.
- Selct Search for titles.
- Press (A) to continue.
- Press (A) on the .tmd file of the game you want to dump.
- Select TMD file options... then select Build CIA (standard).
- Your dump will be in the /gm9/out folder on your sd card.
Dumping a system title as a .cia file:
- Boot your console while holding (START) to launch Godmode9.
- Hold (R)+(A) while pointing to [1:] SYSNAND CTRNAND to open the drive options.
- Selct Search for titles.
- Press (A) to continue.
- Press (A) on the .tmd file of the game you want to dump.
- Select TMD file options... then select Build CIA (standard).
- Your dump will be in the /gm9/out folder on your sd card.
Extracting RomFS from a 3DS game cartrige:
- Insert your gamecart into your console.
- Boot your console while holding (START) to launch Godmode9.
- Navigate to [C:] GAMECART.
- Press (A) on the <titleid>.trim.3ds file in the drive.
- Select NCSD image options..., then select Mount image to drive.
- Press (A) to enter the drive.
- For each file you want to dump, press (A) while hovering over it and select Copy to /gm9/out.
- For each folder you want to dump, press (R)+(A) while hovering over it and select Copy to /gm9/out.
- Press (START) to save and reboot.
- Your files will be in the /gm9/out folder on the SD card.
Extracting RomFS from an NDS game cartrige:
- Insert your gamecart into your console.
- Boot your console while holding (START) to launch Godmode9.
- Navigate to [C:] GAMECART.
- Press (A) on the <titleid>.trim.nds file in the drive.
- Select NDS image options..., then select Mount image to drive.
- Press (A) to enter the drive.
- For each file you want to dump, press (A) while hovering over it and select Copy to /gm9/out.
- For each folder you want to dump, press (R)+(A) while hovering over it and select Copy to /gm9/out.
- Press (START) to save and reboot.
- Your files will be in the /gm9/out folder on the SD card.
Extracting RomFS from an installed title:
- Boot your console while holding (START) to launch Godmode9.
- Hold (R)+(A) while pointing to [A:] SYSNAND SD to open the drive options.
- Selct Search for titles.
- Press (A) to continue.
- Press (A) on the .tmd file of the game which you want to extract the RomFS from.
- Select TMD file options... then select Mount CXI/NDS to drive.
- Press (A) to enter the drive.
- For each file you want to dump, press (A) while hovering over it and select Copy to /gm9/out.
- For each folder you want to dump, press (R)+(A) while hovering over it and select Copy to /gm9/out.
- Press (START) to save and reboot.
- Your files will be in the /gm9/out folder on the SD card.
Extracting RomFS from a system title:
- Boot your console while holding (START) to launch Godmode9.
- Hold (R)+(A) while pointing to [1:] SYSNAND CTRNAND to open the drive options.
- Selct Search for titles.
- Press (A) to continue.
- Press (A) on the .tmd file of the game which you want to extract the RomFS from.
- Select TMD file options... then select Mount CXI/NDS to drive.
- Press (A) to enter the drive.
- For each file you want to dump, press (A) while hovering over it and select Copy to /gm9/out.
- For each folder you want to dump, press (R)+(A) while hovering over it and select Copy to /gm9/out.
- Press (START) to save and reboot.
- Your files will be in the /gm9/out folder on the SD card.
Extracting RomFS from a .cia/.3ds/.nds file:
- Obtain your game file using one of the methods above.
- Boot your console while holding (START) to launch Godmode9.
- Navigate to your game file inside the [0:] SDCARD drive.
- Press (A) on the game file.
- Select <type> image options..., then select Mount image to drive.
- Press (A) to enter the drive.
- Press (A) on any files or (R)+(A) on any folders you want to dump, then select Copy to /gm9/out.
- Your files will be in the /gm9/out folder on the SD card.
Converting .3ds files to .cia files:
- Boot your console while holding (START) to launch Godmode9.
- Navigate to your .3ds file inside of the [0:] SDCARD drive.
- Press (A) on the .3ds file.
- Select NCSD image options... them select Build CIA from file.
- Your converted .cia file will be in the /gm9/out folder on the SD card.
Controls
A - Confirm prompts, select button (menus), Open submenu for files and open directories (main file view), Switch into edit mode (hexviewer)
R+A - Open submenu (on directories)
B - Cancel, Leave menus without action, Hold to cancel said file operations
X - Delete marked files, R+X to Rename files (main file view)
Y - Copy and paste files, R+Y to create folders and dummy files (main file view)
L - Mark file
L+Right/Left - Mark/unmark all files in a folder
L(hold)+Up/Down - Select multiple files
R - Switch buttons to their secondary function
R+L - Screenshot (works almost anywhere)
R+Left/Right - Switch panes
R+Down - Reload the file listing
Start - Reboot from GodMode9, R+Start to poweroff 3DS
Select - Clear or restores the clipboard (depending on if it's empty or not)
Home - Enter HOME menu, including the scripts/payloads submenus, options for formatting the SD, setting the RTC, etc
Power button - Enter HOME menu (alternative)
R+Up (at startup) - Pauses the GodMode9 boot so that you can stare at the splash screen for a little longer
R+Left - If you have installed GodMode9 as your bootloader, this keycombo enters the bootmenu when you hold on startup (if you built GodMode9 as SALTMODE and have it as a bootloader, the keycombo is simply the Start button)
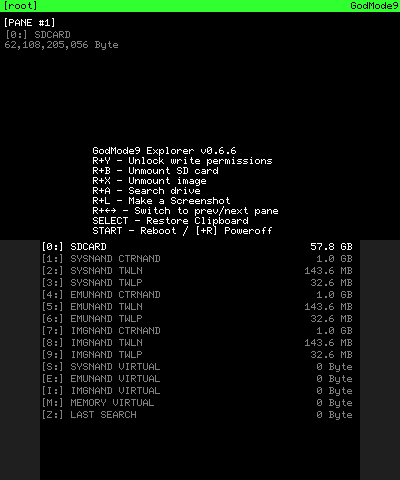
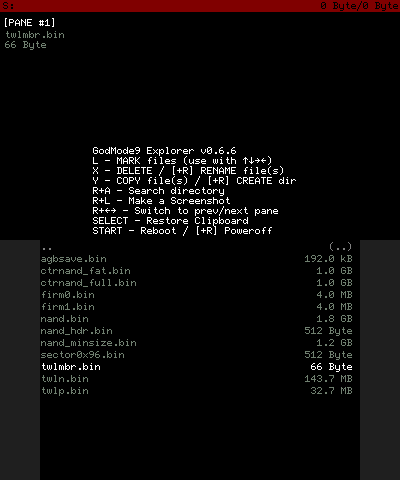
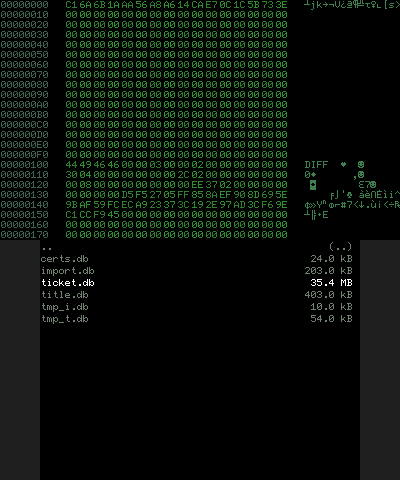
Screenshots

Media
How to Use Godmode9 - to "Dump 3DS Carts to CIA files" & Keep Saves! (Digitally Backup Cartridges) (GameInCanada)
Changelog
v2.1.1
- [improved] Improved installation of DSiWare games (thanks @Epicpkmn11).
- [scripting] Faster script loading as well as other improvements and fixes (thanks @aspargas2).
- [fixed] Fixed a nasty bug when trimming certain DS cart dumps.
- [fixed] Some smaller bugfixes and general code maintenance.
v2.1.0
- [new] Unicode support, including a special Unicode font created for GodMode9 (@Epicpkmn11).
- [new] Support for mounting certs.db, including improvement of certs handling (@luigoalma).
- [new] Support for SHA-1 checksums (@aspargas2).
- [new] Raw cart dumper, accessible via R+A on cart drive.
- [improved] Wider support for flash chips on carts, including ir (@dratini0).
- [scripting] SDSIZE, SDFREE and NANDFREE global variables.
- [scripting] Added cartdump command.
- [fixed] Numerous bugfixes and small improvements, too many to list.
v2.0.0
- [new] Completely revamped title info, with special info for installed titles, TMDs and CIAs.
- [new] Initial CARD2 save read support for carts (thanks @dratini0).
- [improved] Title manager now includes a ticket dumper.
- [improved] Release ntrboot FIRMs now include scripts (thanks @gholms).
- [improved] Software keyboard now includes firstrun instructions.
- [improved/fixed] Various smaller visual improvements and bugfixes.
v1.9.3pre1
- [new] Completely rewritten MCU event handler (fixes a lot of stuff) (thanks @Wolfvak).
- [new] Ability to install, build CIA from, verify, identify DSi CDN content (read below).
- [new] Title manager available via HOME menu (read below).
- [new] NDS carts can be dumped with secure area encrypted (thanks @mariomadproductions for testing).
- [new] Gamecart drive G:/ now includes an info text file (thanks @GerbilSoft).
- [new] Tickets can now be verified, installed and identified.
- [new] Trimming functionality for GBA rom dumps.
- [improved] Improved title info functionality, now compatible with more files.
- [improved] Several improvements to the GM9 MegaScript (thanks @aspargas2).
- [improved] Several improvements to the game image installer.
- [improved] Improved CIA builder, with stricter checks for legit builds.
- [improved] Better handling of special cases in cart dumper (thanks @GerbilSoft).
- [fixed] Proper seed handling when installing game images to the system.
- [fixed] Countless smaller fixes and improvements, too many to list.
- [scripting] 'install' command for installing game images to system.
- [scripting] Quotes can be escaped (\") in variables.
v1.9.2pre1
- [new] Mount support for title.db (thanks @aspargas2).
- [new] Support for handling variable sized tickets (thanks @luigoalma).
- [improved] Proper mount support for ticket.db (thanks @aspargas2).
- [improved] Various improvements to the CIA builder, mostly for CIA from NCSD.
- [improved] Tons of small performance improvements (thanks @Wolfvak).
- [improved] Much smaller firm size (thanks @Wolfvak).
- [fixed] Fixed screen init (for real this time) (thanks @Wolfvak).
- [fixed] Tons of small bug fixes.
- [preview] Possibility to install NCCH, NCSD (.3DS), DSiWare NDS, CIA, NUS/CDN to the system.
v1.9.1
- [new] On verification, offer fixing for badly decrypted NCCH/NCSD.
- [improved] Much faster scrolling speeds in wordwrapped text view.
- [improved] Largely improved method of GBA VC save injection (thanks @TurdPooCharger).
- [fixed] Fixed the .BPS code in scripting (thanks @Wolfvak).
- [fixed] Fixed a crash in the DISA/DIFF handling code (thanks @aspargas2).
- [fixed] Actually allow decrypting N3DS NATIVE_FIRM on O3DS.
- [fixed] Last search drive is back again.
- [fixed] Cart drive checking (don't show empty when it isn't).
- [fixed] Notification light handling.
v1.9.0
- [new] Touchscreen support, used for keyboard (manual calibration is possible, but not required).
- [new] LED support, signaling finished operations when the shell is closed.
- [new] Detecting shell opened/closed, turn off display to save battery.
- [new] Brightness configuration (in HOME menu).
- [new] Support for mounting, reading and writing DISA and DIFF (.db) files (thanks @aspargas2).
- [new] Allow setting attributes for directories.
- [new] Read and write support for gamecart saves (thanks @dratini0).
- [improved] Completely rewritten ARM11 core.
- [improved] Countless under-the-hood improvements thanks to @Wolfvak.
- [fixed] A metric fuckton of bugfixes (quoting @Wolfvak here).
- [scripting] Allow game icons as preview.
Credits
This tool would not have been possible without the help of numerous people. Thanks go to (in no particular order):
- Archshift, for providing the base project infrastructure.
- Normmatt, for sdmmc.c / sdmmc.h and gamecart code, and for being of great help on countless other occasions.
- Cha(N), Kane49, and all other FatFS contributors for FatFS.
- Wolfvak for ARM11 code, FIRM binary launcher, exception handlers, PCX code, Makefile and for help on countless other occasions.
- SciresM for the help on figuring out RomFS and for boot9strap.
- SciresM, Myria, Normmatt, TuxSH and hedgeberg for figuring out sighax and giving us access to bootrom.
- ihaveamac for first developing the simple CIA generation method and for being of great help in porting it.
- wwylele and aspargas2 for documenting and implementing the DISA, DIFF, and BDRI formats.
- dratini0 for savefile management, based on TWLSaveTool.
- b1l1s for the help on figuring out A9LH compatibility.
- Gelex and AuroraWright for the help on figuring out various things.
- stuckpixel for the new 6x10 font and help on various things.
- Al3x_10m for help with countless hours of testing and useful advice.
- WinterMute for helping with his vast knowledge on everything gamecart related.
- profi200 for always useful advice and helpful hints on various things.
- windows-server-2003 for the initial implementation of if-else-goto in .gm9 scripts.
- Kazuma77 for pushing forward scripting, for testing and for always useful advice.
- TurdPooCharger for being one of the most meticulous software testers around.
- JaySea, YodaDaCoda, liomajor, Supster131, imanoob, Kasher_CS and countless others from freenode #Cakey and the GBAtemp forums for testing, feedback and helpful hints.
- Shadowhand for being awesome and hosting my nightlies.
- Plailect for putting his trust in my tools and recommending this in The Guide.
- SirNapkin1334 for testing, bug reports and for hosting the original GodMode9 Discord server.
- Lilith Valentine for testing and helpful advice.
- Project Nayuki for qrcodegen.
- Amazingmax fonts for the Amazdoom font.
- The fine folks on the official GodMode9 IRC channel and Discord server.
- The fine folks on freenode #Cakey.
- All 3dbrew.org editors.
External links
- GitHub - https://github.com/d0k3/GodMode9
- Discord - https://discord.gg/BRcbvtFxX4
- GBAtemp - https://gbatemp.net/threads/release-godmode9-all-access-file-browser-for-the-3ds.420027
- Reddit - https://www.reddit.com/r/3dshacks/comments/mauor0/godmode9_v200_fifth_anniversary_release
- 3DS Guide - https://quantumcat1.github.io/godmode9-usage.html