MessoXtras Xbox
More actions
| MessoXtras | |
|---|---|
 | |
| General | |
| Author | HCF, Madmab |
| Type | Console |
| Version | 0.6 |
| License | Mixed |
| Last Updated | 2018/07/03 |
| Links | |
| Download | |
| Website | |
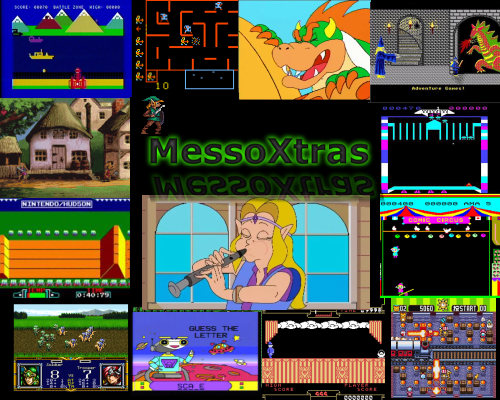
MessoXtras MessoXTras is a port of the MESS emulator for Xbox. Currently it supports 31 systems (both consoles and computers).
Installation
If you had a previous version of MessoXtras installed and want to keep the configuration files:
- Do a backup of your folders ini and cfg (if you have any customized ones).
- Also, the sta folder contains your savestates, and you may also want to keep it.
- All the other files and folders can be overwritten with the new MessoXtras.
Where to place rom:
- Roms should be placed in the roms folder. Inside of that folder, there is a subfolder for each system.
- For example, roms/scv is the folder for the Super Cassette Vision, and roms/cdimono1 is the folder for the Philips CDi.
- Make sure not to change the names of these folders.
Most of the systems emulated by MESS requires a dump of the internal chips of the original system. They should be placed in the roms folder.
How to use
Launch the default.xbe and select the desired console/computer that you want to emulate (A). After that, you will see all the games for that system, and you can select the one that you want to play (A), or create an individual configuration file for that game (X). This is useful in keyboard-based systems, where each game needs a different input configuration.
In the list of systems, you will see that some of them are green, and other systems are yellow. Yellow systems usually need a keyboard to play many games (you can use the Virtual Keyboard if you don't have a real keyboard plugged on your Xbox, and/or create an individual config file for each game, as stated before). Green systems should be easily controlled with a joypad and the generic configuration file.
If the emulator displays a message telling press OK, simply move to left and right the left analog stick, and the game will begin.
There are generic controls, and specific controls for each system. Both can be configured. The most important keys are the A and White buttons (they are normally used to Start a game and/or Action button), the Start button (Main Menu) and the Back button (exit/cancel). Pressing both triggers simmultaneously activates the Fast forward (used to make load times shorter in some systems), and moving the right analog stick displays the virtual keyboard.
Specific information about how to use each system can be found in README-SYSTEMS-DETAILED.txt.
Savestates
Several systems support savestates.
- Save state - Press the right analog stick, then select the desired slot (A to confirm, Back to cancel).
- Load state - Press the left analog stick, then select the desired slot (A to confirm, Back to cancel).
Virtual kyboard
If you don't have a real keyboard, you can configure the controls and map the most used keys to the buttons of your joypad. But another alternative is using the Virtual Keyboard feature.
The virtual keyboard is very useful when you only need to press a key once (for example, if a game says press S to Start) and it is not worth it to map that key to one of the joypad buttons. The virtual keyboard is also useful to type commands (for example, to load games in the computer-based systems).
If you move the right analog stick, the emulation will be paused and the virtual keyboard will appear. You can select the key or keys that you want to press, selecting them with the A button. You can even type a text, pressing the keys one after the other.
If you make a mistake, you can press on the Backspace key (or press the X button) to erase the last pressed key. When you finished entering your text, press B and the virtual keyboard will disappear. The text that you typed will be pasted and the emulation will go on.
If you press Start while in the Virtual Keyboard, you will get access to the Hint related to the current system (read the following section for more info).
Computer-based systems
Many of these require you to type a few commands to launch a game (LOAD, RUN, CLOAD...). You can see these commands in the README-SYSTEMS-DETAILED.TXT file, but they are often difficult to memorize, so some of the hints can be found in the emulator.
Enter the Virtual keyboard (pressing both triggers). While in the virtual keyboard, press Start and that will activate the hint. Exit the virtual keyboard (pressing B) and the emulator will display a hint about the command that you must use in the current system.
The hint will disappear in a matter of seconds, unless you launch the virtual keyboard again. If you do so, you will be able to read the hint while you type the commands.
Launching games from DVD
The emulator only works if it is installed in the hard disk of your Xbox. But if you want to save disk space, you can save your roms in DVDs.
You must record a DVD in the UDF format typical for Xbox, and keep the same roms folder structure.
For example, if you are recording CDi games in a DVD, you should put them in the D:/roms/cdimono1 folder (other folders won't work).
In the rom selection menu, pressing the WHITE button you will see the roms stored in your DVD, and pressing the BLACK button you will see again the roms stored in your hard disk.
CDi Games
MessoXtras supports CDi games in the old CHD format that was used in MESS 0.140. But if you have CHD files for MESS, they are probably in the new CHD format (not supported).
To solve this problem, in this release we have included a script named chd_revert developed by Madmab, to convert files from the new CHD format to the old one, that is supported in MessoXtras.
Simply copy your new CHD files in the same folder than the script, and launch chd_revert.bat. The script will create CHD images in the old format (supported by MessoXtras) and place them in a directyory named v140. Simpy copy these generated files in the v140 directory over to your xbox in the roms\cdimono1 folder, and you will be able to play them.
CDi compatibility list in MessoXtras.
FAQ
Q. The controls (for example the Start button to open the Main Menu) sometimes don't work!
You have probably pressed the Y button, that toggles the keyboard emulation mode.
When you do it, some of the main commands don't work. Press Y button again to go back to the main emulation mode.
Q. How does the Philips CDi emulation work?
Surprisingly, it runs at very good speed. At first it worked like a snail, but we did a very effective optimization and now it runs at full speed in Xbox.
Some games don't work because some video modules of the CDi are not emulated, but a lot of the most famous games run very well.
Q. How can I build valid CDi roms?
MessoXtras supports CDi games in the old CHD format that was used in MESS 0.140. If you have CHD files for MESS, they are probably in the NEW CHD format.
In the emulator there is a folder chd_revert with an script developed by Madmab, to convert files from the new CHD format to the old one, that is supported in MessoXtras.
Q. Parts of the top, bottom, left or right ofthe screen are cut off.
You can adjust the screen size by pressing Start button to bring up the menu. Then select Slider Controls.
Decrease Screen Vert Stretch to affect top/bottom and Screen Horiz Stretch for right/left.
Q. Roms don't appear in my emulator anymore!
You probably pressed the White button in the rom selection screen. In that case, the emulator tries to load roms from your DVD unit.
Press the Black button to read roms from your hard disk again.
Controls
General:
Left-Stick/D-Pad - Move
A/White/Black - Start, Action (in most systems)
Start - Main menu
Back - Cancel, Exit (exit from a menu, or exit from the emulator)
L+R - Fast forward (boosts the emulation; it is useful to improve the loading times)
Left-Stick Thumb - Load State
Right-Stick Thumb - Save state
Right-Stick - Opens the Virtual Keyboard
Y - Toggles the keyboard emulation mode (usually you will not need to do this)
L - ENTER (in systems with a keyboard)
R - Space (in systems with a keyboard)
Apple Macintosh Plus:
Left-Stick Move the mouse
White - Mouse click
Bally Astrocade:
D-Pad/Left-Stick - Movement
A - Action
White - 1
X - 2
B - 3
Black - 5
Casio PV-100:
White - Start
Black - Select game mode (1 player, 2 players...)
A - Action
Emerson Arcadia 2001:
White - Start
Black - Select
A - 0
Epoch Game Pocket Computer:
White - Start, Action
Epoch Super Cassette Vision"
A - Button 1
B - Button 2
White - "1" (Start game mode 1)
X - "2" (Game mode 2)
Y - "3" (Game mode 3)
Virtual Keyboard doesn't work.
Fairchild Channel F:
A/B/White - Game keys (some games require you to redefine keys, or even use the second controller)
Funtech Super A'Can:
White - Start
A/B - Game keys
Hartung Game Master:
White - Start
A - Action
Mega DUck:
Whitwe - Start
A/B - Game keys
Sharp MZ-2500/ Sharp X1:
A/B - Game keys (require real keyboard in some games)
Socrates Educational video system/Tomy Tutor:
Require virtual keyboard, preferably using a real keuboard.
Sord M5:
White - Start 1 player game (it is also used for Action in some games).
Black - Start 2 players game
A - Action
Mattel Aquarius/Micro 16/Microbee PC85 Premuim/Misrokey Primo B64:
Require real keyboard.
Screenshots
Media
Evolution of MessoXtras (MESS for Xbox) (HCF Retrocoder)
Known issues
- The virtual keyboard don't work in a few systems: Bally Astrocade, Epoch Super Cassette Vision, or Emerson Arcadia 2001.
- The ENTER key don't work in a few computer-based systems. But this is not a problem, because it is mapped to a button of the joypad (usually the left trigger).
Changelog
v0.6
- New supported systems: Apple Macintosh Plus (hard disk images), Microbee, Microkey Primo B-64, Tomy Tutor, VTech Creativision.
- Speed improved (less slowdowns now).
- Launching a game with the X button, we create an individual configuration file for that game (in the old version, configuration files were made for each system). With this trick, all the keyboard-based systems are playable even if you don't have a keyboard, because you can assign different button configurations per game.
- Now you can have your roms in DVDs, to save hard disk space (for example, you can save your favorite Philips CDi games in a DVD recorded in UDF format, in a folder named D:\roms\cdimono1, and then select this media with the white button in the rom selection menu).
- After you exit from a game, the menu will return to the previously selected system and rom.
- Fixed a bug in the Philips CDi emulation: now the game "The Apprentice" works.
- All the games are included and playable in the Socrates Educational Video System (in the old release, only the basic BIOS games were available).
Credits
Millions of thanks to Madmab for his HUGE help in this project. Also many thanks to the rest of developers that helped with their ideas and support. This project came to life due to the awesome development community under the Xbox scene.
External links
- EmuXtras - https://www.emuxtras.net/forum/viewtopic.php?f=189&t=6325
- EmuXtras - https://www.emuxtras.net/forum/viewtopic.php?f=189&t=5987
- Emulation General Wiki - https://emulation.gametechwiki.com/index.php/MESS