| Advanced Badge Editor | |
|---|---|
 | |
| General | |
| Author | TheMachinumps |
| Type | Theme Tools |
| Version | 1.3.1 |
| License | Mixed |
| Last Updated | 2017/07/10 |
| Links | |
| Adv. Badge Editor + Injector Download | |
| Website | |
| Source | |
An advanced 3DS Badge Editor.
Features
- Edit badge and set information such as IDs, quantities and names.
- Create new badges and new sets.
- Get 255 of each badge with a single click of a button.
- Has a nice interface.
- A simple way of importing and exporting images, as well as a preview of each.
- Pixel Badge Import Mode, able to import Pixel like badges without suffering from imperfections when downscaling to 32x32px.
- Support for badges with linked Title IDs.
- Change your NNID with ease.
- Delete badges, sets or everything with the click of a button.
- Import badge and set files! (*.prb, *.cab).
- Fix the badges' set IDs. (sets the badges' set IDs to the respective set ID).
- Create new badge data and save it to a new location.
User guide
General use
How to open existing data:
- Click on the "File", and then the "Open data" options in the menu toolbar.
- Select a directory (folder) that contains "BadgeData.dat" file and the "BadgeMngFile.dat".
How to create new data:
- Click on the "File", and then the "New data" options in the menu toolbar.
- Make whatever you want, and set the NNID number to yours if you want it to work (read down below to know how to do that).
How to save data:
- Click on the "File", and then the "Save data"/"Save data to..." options in the menu toolbar.
- If you opened data, this will overwrite the old data.
- If you created new data, then it will ask you to save it to a folder.
If you want to make a badge:
- Click the "Create new badge" button, and on the badge info, type in any name and any quantity.
- To add an image, make sure you import a 64x64px image by clicking the "Import image" button under the badge's preview.
If you want to make a set:
- Similar to making a badge, but now you will need to press the "Create new set" button.
- If it gives you an error saying that you don't have enough unique badges for a new set, then that means that last set only has one badge, and that badge is the last unique badge.
- To fix this, you can either create a new badge or change the Starting Badge of the last set to its value minus 1.
- To import an image, click on the "Import image" button under the set's preview. Make sure the size of the image you're importing is of 48x48px, not 64x64px.
Simple Badge Injector
This tool is used in the explanations bellow.
- For Homebrew Launcher users - Extract the zip and copy it inside the "3ds" file on your 3DS's SD card.
- For CFW users - Launch FBI, go to TitleDB and find "Simple Badge Injector". Install that.
How to get your NNID number
For Homebrew Launcher users:
- Load Homebrew Launcher with the exploit of your choice.
- Launch the "Simple Badge Injector" application.
- If it fails to read the NNID, then make sure that you are using the latest *hax exploit version, and that you have internet.
- The NNID should appear on the top screen.
For CFW users:
- Launch the "Simple Badge Injector" application.
- The NNID should appear on the top screen.
How to get the .dat files
For Homebrew Launcher users:
- Load Homebrew Launcher with the exploit of your choice.
- Launch the "Simple Badge Injector" application.
- Once the app has loaded, select the "Dump badge data" option.
- If the process fails, then go back to the homebrew launcher by selecting the "Exit" option, take your SD card out and put it back in. Launch the app and try again.
- Once done, you can exit the application and exit Homebrew Launcher.
- You should now have the .dat files inside a "Dumped Badge Files" folder on the root of your SD card.
For CFW users:
- Launch the "Simple Badge Injector" application.
- Once the app has loaded, select the "Dump badge data" option.
- Once done, you can exit the application.
- You should now have the .dat files inside a "Dumped Badge Files" folder on the root of your SD card.
How to restore the .dat files
Setup:
- Create a folder on the root of your 3DS's SD card called "Badge Files".
- Make sure that inside of that folder, you have the "BadgeData.dat" and "BadgeMngFile.dat" files that you want to inject!
For Homebrew Launcher users:
- Load Homebrew Launcher with the exploit of your choice.
- Select the "Simple Badge Injector" app and launch it.
- Next, select the "Inject custom badge data" option, and wait.
- If the process fails, then go back to the homebrew launcher by pressing B, take your SD card out and put it back in. Launch the app and try again.
- Once done, you can exit the application and exit Homebrew Launcher.
For CFW users:
- Launch the "Simple Badge Injector" application
- Once the app has loaded, select the "Inject custom badge data" option.
- Once done, you can exit the application.
Create ExtData archive without Nintendo Badge Arcade
This will let you inject custom badge data without Nintendo Badge Arcade, just like GYTB.
For Homebrew Launcher users:
- Load Homebrew Launcher with the exploit of your choice.
- Select the "Simple Badge Injector" app and launch it.
- Next, select the "Create ExtData archive 0x14D1" option, and wait.
- NOTE: This might not work, I didn't test it with Homebrew Launcher
- You should now be able to inject your own badge data and use badges without Nintendo Badge Arcade.
For CFW users:
- Launch the "Simple Badge Injector" application.
- Once the app has loaded, select the "Create ExtData archive 0x14D1" option.
- You should now be able to inject your own badge data and use badges without Nintendo Badge Arcade.
- If you find any Exception, please take a screenshot of it by pressing "Alt + prt sc" on a desktop or "Alt + fn + insert" on a laptop, paste the screenshot into paint and save the image. You don't need to do it like that, but, it's a nice and simple way of doing it.
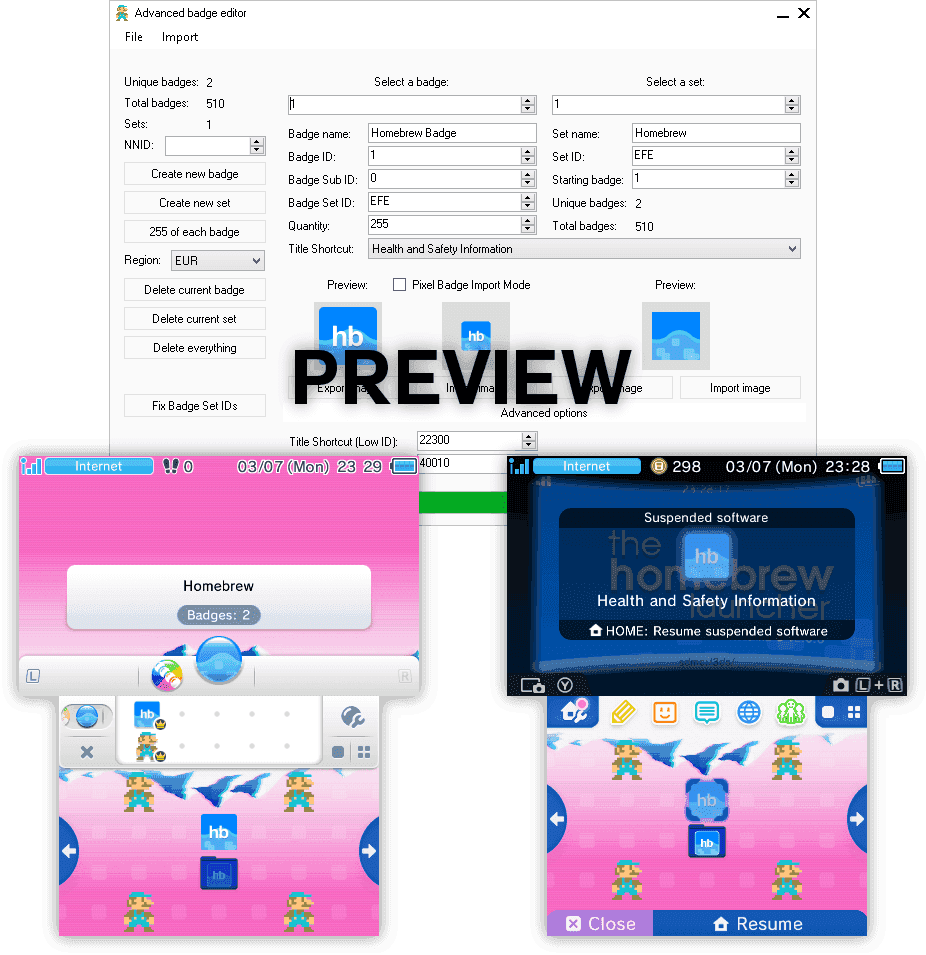
Screenshots
Changelog
1.3.1
- Create new badge data.
- Save badge data to a new location.
1.3
- Import set files and badge files at once and automatically set the starting badge to the first imported badge.
- Added a progress bar. Things can be slow with a lot of badges, so now you can look at the progress.
- Fixed something with the images.
- Asterisk sound now plays when badge data is done loading or saving, that way, you know exactly when it's done.
1.2
- Added support for *.prb and *.cab files (PRBS and CABS).
- Images won't look crappy any more when importing them.
1.1.3
- Possible to delete badges, sets or everything at once.
1.1.2.1
- Fixed stuff with Title IDs.
1.1.2
- Added support for badges with linked Title IDs.
- Enabled editing the NNID.
1.1.1
- Fixed some bugs.
- Added "Pixel Badge Import Mode" for Pixel like badges.
1.1
- New and simpler way of importing and exporting images.
- Image preview also available.
1.0.1
- Updated Graphical User Interface.
1.0
- First version.
Credits
- https://www.3dbrew.org/wiki/Home_Menu#BadgeData.dat
- https://gbatemp.net/threads/nintendo-badge-arcade-hacking-full-documentation-and-progress.403183
- A bunch of https://stackoverflow.com posts on how to program in c#.
- Some https://youtube.com videos that showed how to read Hex data (Binary Data) from any file and how to write those same files.
- Visual studio 2015 community: https://www.visualstudio.com/vs/community